
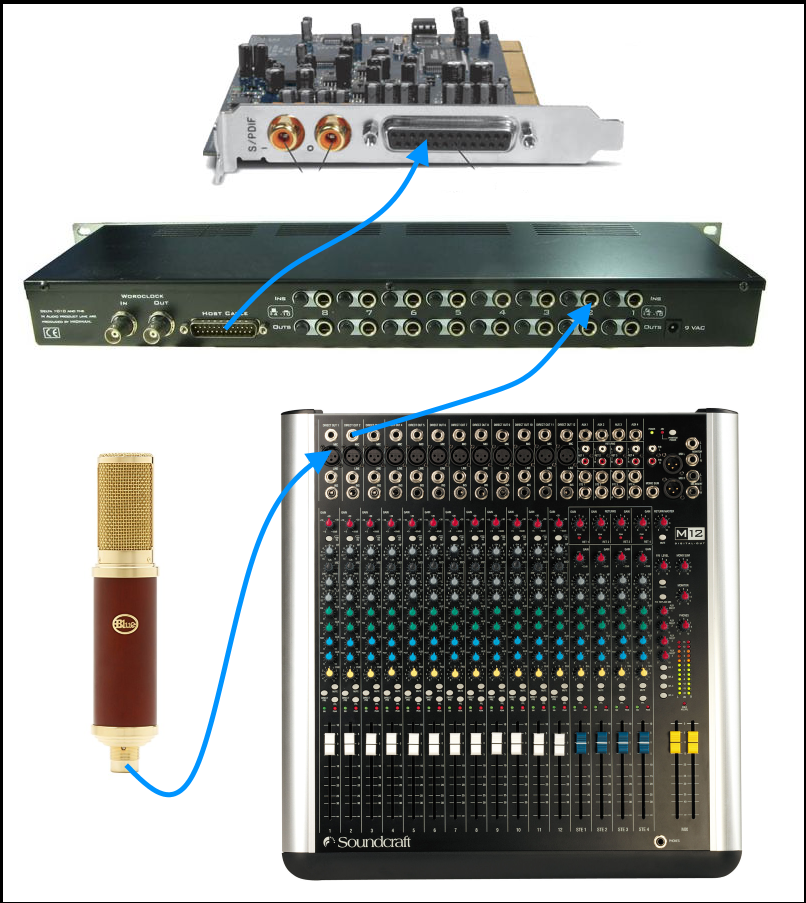
When preparing to make your first recording in Reaper, first ensure your equipment is properly connected. As an example, the following is equipment I had for many years. If I want to record to the Blue Woodpecker microphone, the microphone should be connected to an input on the mixer, a 1/4 inch audio cable would be connected from the mixer to the M-Audio Delta 1010 break out box, and a parallel cable would be connected from the break out box to the M-Audio Delta 1010 PCI card in the PC.
When speaking into the microphone, ensure the mixer detects a signal. In this example, the SIG LED illuminates to verify there is a signal.

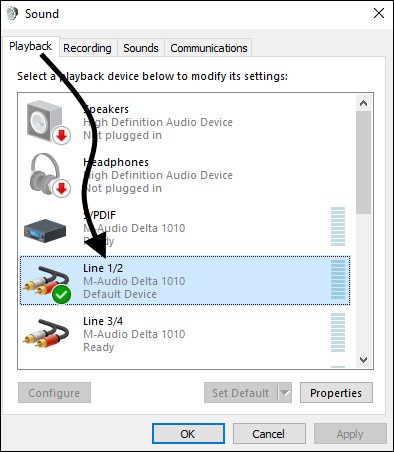
In Windows, ensure Line 1/2 is the default playback device.
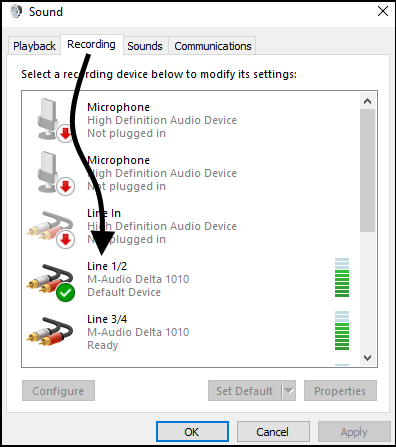
Ensure Line 1/2 is the default recording device.
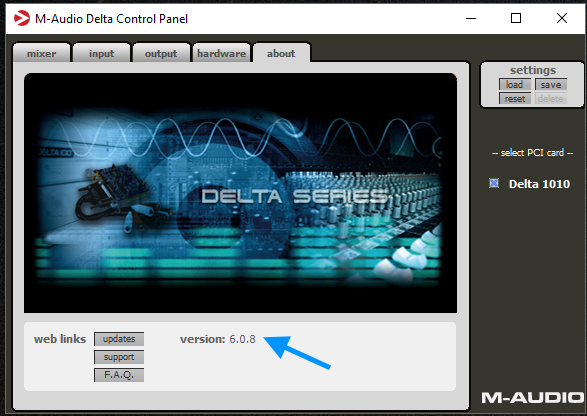
Ensure the sound card is using a driver supported by your operating system. In this example, the M-Audio Delta 1010 sound card is using driver version 6.0.8.
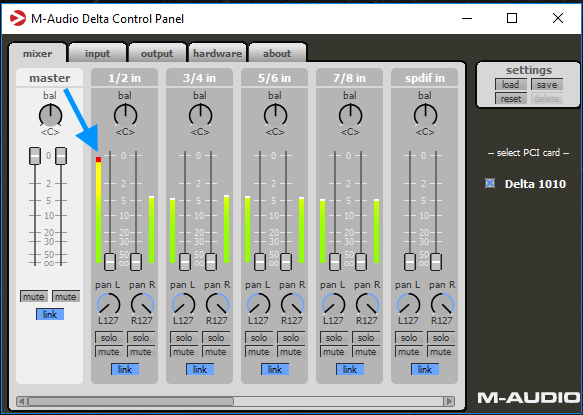
Ensure the sound card has an audio signal. In this example, Line 1 spikes when there is inpt in the microphone, confirming that the sound card is detecting audio from the microphone.
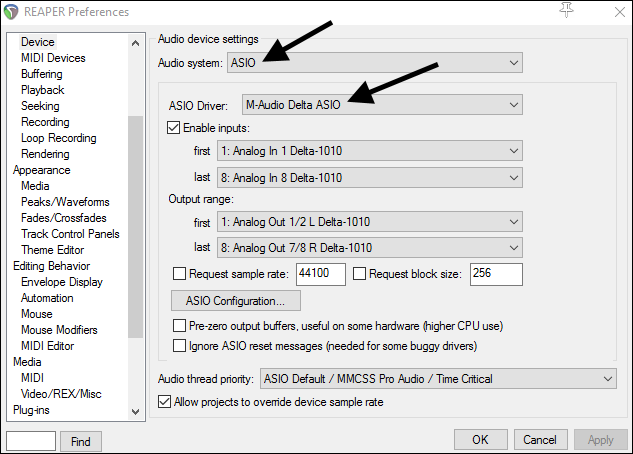
In Reaper, select Options > Preferences. Ensure Audio system is set to ASIO. In this example, the M_Audio Delta 1010 is the ASIO device..
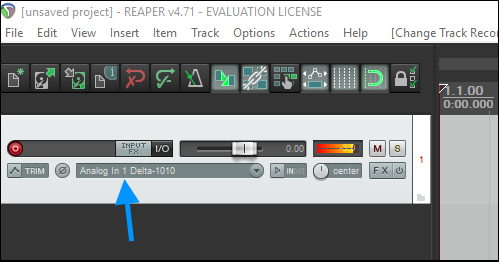
Select Insert > Track. Select the circular icon to arm the track. Ensure the track is configure to use the same track as the microphone is using on the mixer. In this example, the track would be set to Analog In 1, since the microphone is connected to track 1 on the mixer.
Did you find this article helpful?
If so, consider buying me a coffee over at 