
If you are not familiar with Cross Component Trace (XTC), check out our getting started article.
Using the web console
- In the WebSphere admin console, expand Troubleshooting and select Logs and Trace.
- Select the component that you want to enable Cross Component Tracing (XCT) on, such as an application server, node, or deployment manager.
- Select Change log detail levels.
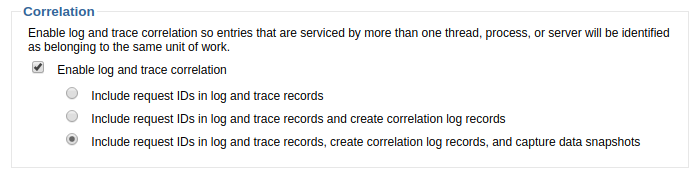
- Check Enable log and trace correlation and select one of the three bullets.
- Select OK.
- Select Save.
In this example, Include request IDs in log and trace records, create correlation log records, and capture data snapshots is enabled.
Using the command line
Connect to the wsadmin utility using the Jacl language. Create a variable named xctBean to query the cross component trace MBean.
set xctBean [$AdminControl queryNames *:*,type=XCTMBean]
The getLevel command will display the current
wsadmin> $AdminControl invoke $xctBean getLevel
Cross Component Tracing can be disabled using the setLevel disable option.
wsadmin> $AdminControl invoke $xctBean setLevel disable
Cross Component Tracing can be enabled using the setLevel enable option.
wsadmin> $AdminControl invoke $xctBean setLevel enable
Cross Component Tracing can be enabled with the data snapshot option.
wsadmin> $AdminControl invoke $xctBean setLevel {"enable with data snapshot"}
Cross Component Tracing can also be set to level READY. When set to READY, the server responds to cross component trace call from other servers
wsadmin> $AdminControl invoke $xctBean setLevel READY
Did you find this article helpful?
If so, consider buying me a coffee over at 