
If you are not familiar with how SSL works in WebSphere, check out our getting started article.
There are two ways to add a self-signed certificate to a keystore in WebSphere. You can either use the WebSphere admin console to create and add the self-signed certificate to a keystore, or you can create the keystore using some other tool (such as the Java keytool command) and then import the keystore into WebSphere.
Create the self-signed certificate using the WebSphere admin console
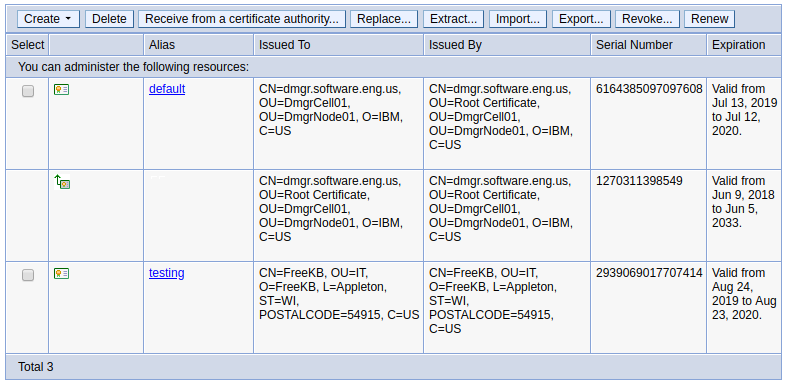
In the WebSphere admin console, at Security > SSL certificate and key management > Key stores and certificates > your_keystore > Personal certificates, select Create > Self-Signed Certificate. In this example, a self-signed certificate named testing was created.
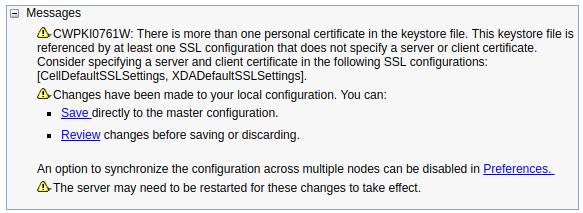
If the keystore does not have a default certificate assigned, the following message will be displayed. Refer to SSL configurations for the steps on how to assign a default certificate.
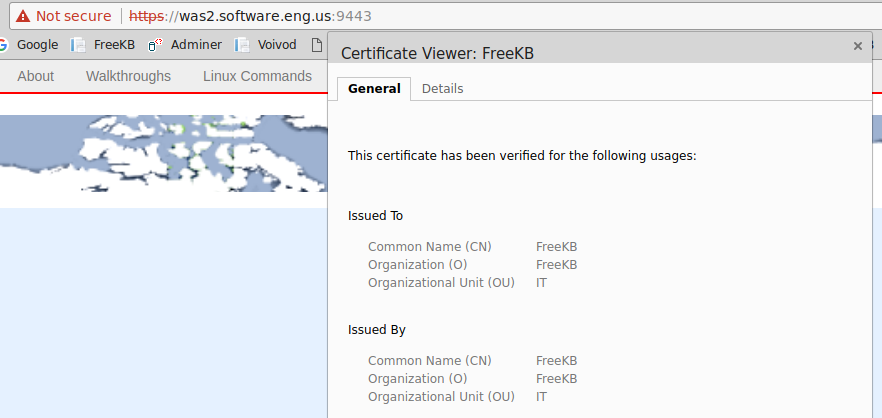
In this example, I created a self-signed certificate for FreeKB in the keystore and updated the SSL configuration to use the FreeKB certificate as the default certificate.
Import a keystore into WebSphere
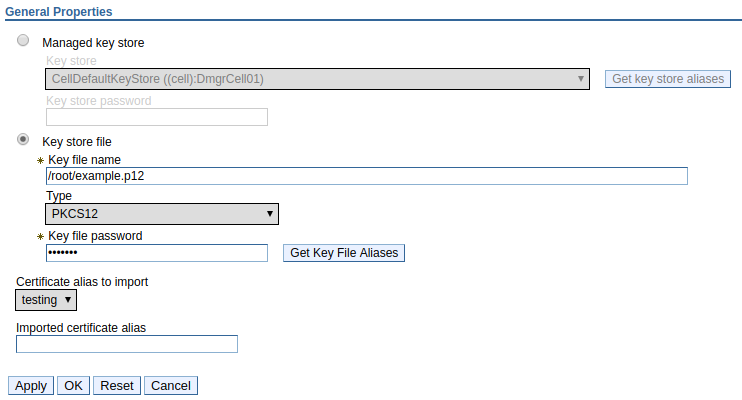
In the WebSphere admin console, at Security > SSL certificate and key management > Key stores and certificates > your_keystore > Personal certificates, select Import. Provide the absolute path to the keystore file (/root/example.p12 in this example), the keystore type, and keystore password, and select Get Key File Aliases. This will update the Certificate alias to import drop-down with the certificates in the keystore. Using the drop-down, select the certificate you want to import. In this example, the "testing" certificate is imported.
Adding a self-signed certificate to a keystore will not add the certificate to a truststore (trust.p12). If you do not add the certificate to the trust store, you will get this prompt when restarting the dmgr.
*** SSL SIGNER EXCHANAGE PROMPT ***
SSL signer from target host x.x.x.x is not found in trust store ${WAS_INSTALL_ROOT}/profiles/your_profile/etc/trust.p12.

Here is the signer information (verify the digest value matches what is displayed at the server):

Subject DN: CN=FreeKB, OU=IT, O=FreeKB, L=Appleton, ST=WI, POSTAL CODE=54915, C=US
Issuer DN:  CN=FreeKB, OU=IT, O=FreeKB, L=Appleton, ST=WI, POSTAL CODE=54915, C=US
Serial number: 3022554607927775
Expires:       Monday Aug 24 12:41:55 CDT 2020
SHA-1 Digest: 40:B4:0B:4D:16:c2:88:EF:31:A3:EE:65:FF
MD5 Digest    EF:65:1A:19:75:D3:A4:D6:21:57:82:1F:30

Add signer to the trust store now? (y/n)
Did you find this article helpful?
If so, consider buying me a coffee over at 