Java - Set Java Runtime Environment (JRE) in Eclipse

by
Jeremy Canfield |
Updated: December 06 2022
| Java articles
Almost always, you will be deploying your Java application to an application server such as JBoss, Tomcat, or WebSphere. When possible, I like to ensure that Eclipse is configured with the same Java Runtime Environment (JRE) as the application server. For example, if the application server is using Java Runtime Environment 8u311 then I would download and install Java Runtime Environment 8u311 on my system running Eclipse.
To be absolutely certain that Eclipse is being run on a certain Java Runtime, you can updated eclipse.ini with the -vm option.
- The
-vmoption and its value (the path to the javaw.exe file) must be on separate lines - The value must be the full absolute or relative path to the javaw.exe file
- The
-vmoption must occur after the other options and before the-vmargsoption - For 32-bit Eclipse a 32-bit version of Java must be used - Or 64-bit Java for 64-bit Eclipse
-startup
plugins/org.eclipse.equinox.launcher_1.4.0.v20161219-1356.jar
--launcher.library
plugins/org.eclipse.equinox.launcher.win32.win32.x86_64_1.1.551.v20171108-1834
-product
org.eclipse.epp.package.jee.product
-showsplash
org.eclipse.epp.package.common
--launcher.defaultAction
openFile
--launcher.defaultAction
openFile
--launcher.appendVmargs
-vm
C:\Program Files\Java\JDK8u332-B09\bin\javaw.exe
-vmargs
-Dosgi.instance.area.default=@user.home/eclipse-workspace
-XX:+UseG1GC
-XX:+UseStringDeduplication
-Xms256m
-Xmx1024m
--add-modules=ALL-SYSTEM
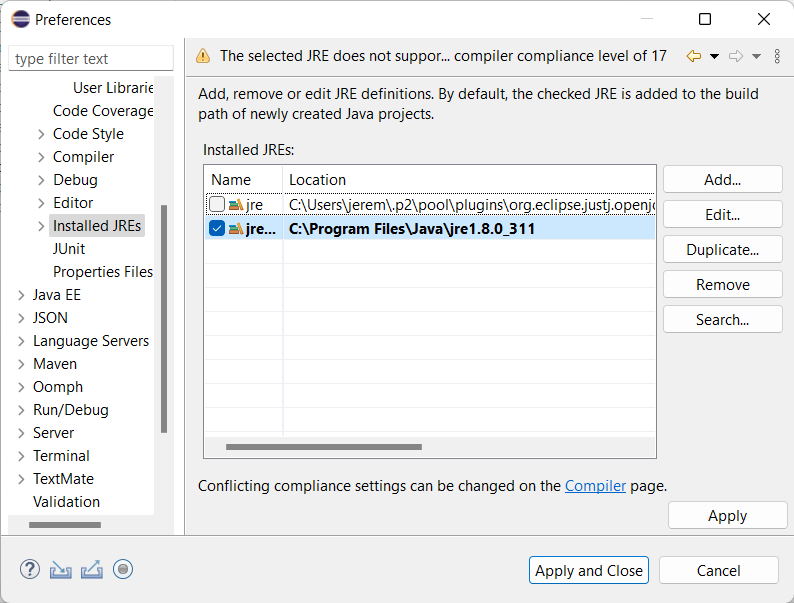
Or, you could do the following to set the Java Runtime Environment.
- Go to Window > Preferences > Java > Installed JREs
- Select Add
- Select Standard VM > Next
- Directory will be something like C:\Program Files\Java\jre1.8.0_311 and JRE name will be something like jre1.8.0_311 > Finish
- Check mark the new Java Runtime Environment > Apply and Close
You may want to:
Did you find this article helpful?
If so, consider buying me a coffee over at 