
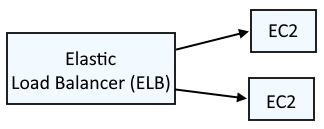
An Elastic Load Balancer (ELB) is typically used to load balance requests across two (or more) different EC2 instances.
This assumes you have already configured the aws command line tool. If not, check out my article on Getting Started with the AWS CLI.
There are a few different types of load balancers.
- Application Load Balancers (e.g. you have a web app that you want to load balance)
- Network Load Balancers (e.g. you have SQL databases that you want to load balance)
- Gateway Load Balancers
- Classic Load Balancers (deprecated)
When creating an Application Load Balancer, you will need a Target Group. A Target Group is:
- One or more EC2 instances using the EC2 instances ID
- One or more EC2 instances via IP address
- One or more EC2 instances via Lambda
- One or more Application Load Balancers (in other words, an group of Application Load Balancers)
Before creating the target group, you will need to get the Virtual Private Cloud (VPC) ID that the Target Group will reside in. In this example, the aws ec2 describe-vpcs command is used to list the Virtual Private Clouds (VPC).
Notice in this example that the Virtual Private Cloud (VPC) has CIDR block (e.g. 172.31.0.0/16). In this scenario, the Target Group would need to consist of EC2 instances that are also in the same Virtual Private Cloud (VPC).
~]$ aws ec2 describe-vpcs
{
    "Vpcs": [
        {
            "CidrBlock": "172.31.0.0/16",
            "DhcpOptionsId": "dopt-017f0a715e4ce2fc9",
            "State": "available",
            "VpcId": "vpc-014d2fcfa335d3c01",
            "OwnerId": "123456789012",
            "InstanceTenancy": "default",
            "CidrBlockAssociationSet": [
                {
                    "AssociationId": "vpc-cidr-assoc-0ea47fa8ac93edd9f",
                    "CidrBlock": "172.31.0.0/16",
                    "CidrBlockState": {
                        "State": "associated"
                    }
                }
            ],
            "IsDefault": true,
            "Tags": [
                {
                    "Key": "Name",
                    "Value": "default"
                }
            ]
        }
    ]
}
The aws elbv2 create-target-group command can be used to create the target group. In this example, the Target Group will accept requests coming on on HTTP port 80. Also notice that no targets have been added to the Target Group. This just creates the Target Group will no targets.
~]$ aws elbv2 create-target-group --name my-target-group --protocol HTTP --port 80 --target-type instance --vpc-id vpc-014d2fcfa335d3c01
{
    "TargetGroups": [
        {
            "TargetGroupArn": "arn:aws:elasticloadbalancing:us-east-1:123456789012:targetgroup/my-target-group/b2b3a8d3a57c741d",
            "TargetGroupName": "my-target-group",
            "Protocol": "HTTP",
            "Port": 80,
            "VpcId": "vpc-014d2fcfa335d3c01",
            "HealthCheckProtocol": "HTTP",
            "HealthCheckPort": "traffic-port",
            "HealthCheckEnabled": true,
            "HealthCheckIntervalSeconds": 30,
            "HealthCheckTimeoutSeconds": 5,
            "HealthyThresholdCount": 5,
            "UnhealthyThresholdCount": 2,
            "HealthCheckPath": "/",
            "Matcher": {
                "HttpCode": "200"
            },
            "TargetType": "instance",
            "ProtocolVersion": "HTTP1",
            "IpAddressType": "ipv4"
        }
Did you find this article helpful?
If so, consider buying me a coffee over at 