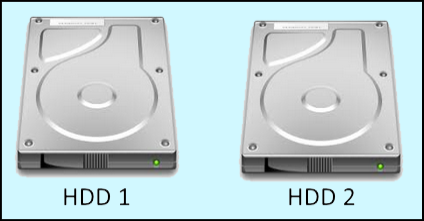
For this tutorial, we will use an example where two 2 TB hard disk drives (HDD) are connected to the computer.

If this is a new install of Linux, RAID can be setup during the install of Linux. For example, you could follow the steps in the article on how to install CentOS. If you have an already established install of Linux, read on.
Before configuring RAID in Linux, we need to understand how to view RAID in Linux. Let's use an example where RAID was configured during the install of Linux. The fdisk -l command can be used to view the partition type. In this example, there are a variety of partition types, include two raid partitions. There is also a listing of /dev/md127. "md" is associated with RAID in Linux.
[root@server1 ~]# fdisk -l | less
/dev/sda1   83  Linux
/dev/sda2   8e  Linux LVM
/dev/sdb1   fd  Linux raid autodetect
/dev/sdc1   fd  Linux raid autodetect
/dev/md127
The df -h command can be used to gather additional information regarding the layout of the partitions. In this example, /dev/md127 is listed, which confirms the system is configured with RAID.
[root@server1 ~]# df -h
Filesystem  Size  Used  Avail  Use%  Mounted on
/dev/md127  1.8T  887G  834G    52%  /
/dev/sda1   488M  100M  354M    22%  /boot
To add a hot spare
In this example, we will add a third storage to our system at /dev/sdd. We will then add the third HDD to the RAID array, as a hot spare.

After connecting the new HDD to the Linux machine, follow the directions in the article on how to create a new partition using fdisk in Linux. Ensure the new partition uses type fd for Linux raid autodetect. Once completed, used the fdisk -l command again to verify the third HDD is listed. If the type is Linux LVM, follow the instructions in the article on how to change an LVM partition to a RAID partition in Linux.
[root@server1 ~]# fdisk -l | less
/dev/sda1  83  Linux
/dev/sda2  8e  Linux LVM
/dev/sdb1  fd  Linux raid autodetect
/dev/sdc1  fd  Linux raid autodetect
/dev/sdd1  fd  Linux raid autodetect
/dev/md127
If mdadm is not installed, use apt-get or yum to install mdadm.
[root@server1 ~]# apt-get install mdadm
[root@server1 ~]# yum install mdadm
View the current RAID configuration.
[root@server1 ~]# mdadm --detail /dev/md127
Number  Major  Minor  RaidDevice  State
0       8      17     0           active sync /dev/sdb1
1       8      33     1           active sync /dev/sdc1
Similarly, viewing the md statistics produces helpful information.
[root@server1 ~]# cat /proc/mdstat
Personalities : [raid1]md127 : active raid1 sdc1[1] sdb1[0]
Add the new disk (/dev/sdd1) to the RAID array (/dev/md127). The --remove option can be used to remove the drive from the RAID array.
[root@server1 ~]# mdadm --add /dev/md127 /dev/sdd1
mdadm: added /dev/sdd1
The newly added drive will be listed as a spare.
[root@server1 ~]# mdadm --detail /dev/md127
Number  Major  Minor  RaidDevice  State
0       8      17     0           active sync /dev/sdb1
1       8      33     1           active sync /dev/sdc1
2       8      49     -           spare       /dev/sdd1
Similarly, the "S" in this command means the /dev/sdd1 is a hot spare.
[root@server1 ~]# cat /proc/mdstat
Personalities : [raid1]md127 : active raid1 sdd1[2](S) sdc1[1] sdb1[0]
It is good to have a hot spare. This way, if one of the drives in the RAID array fails, the hot spare can be used to reestablish the RAID array.
Did you find this article helpful?
If so, consider buying me a coffee over at 