SCCM - Create a boundary group


by
Jeremy Canfield |
Updated: March 13 2020
| SCCM articles
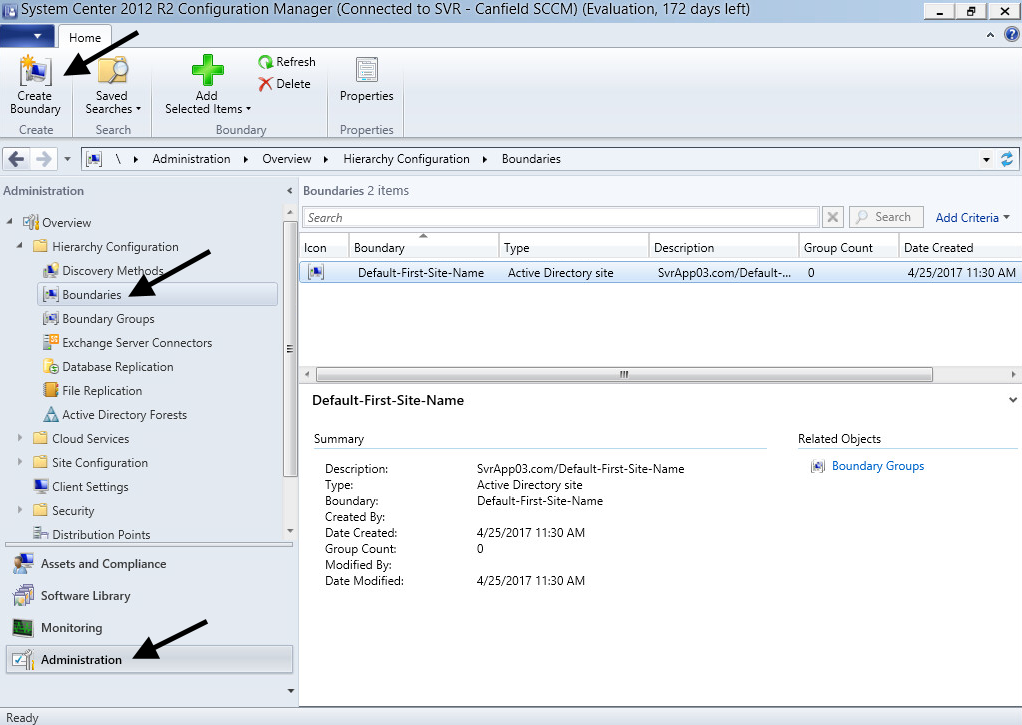
- In the left panel of SCCM, select Administration.
- Expand Hierarchy Configuration and select Boundaries.
- Select Create Boundary.
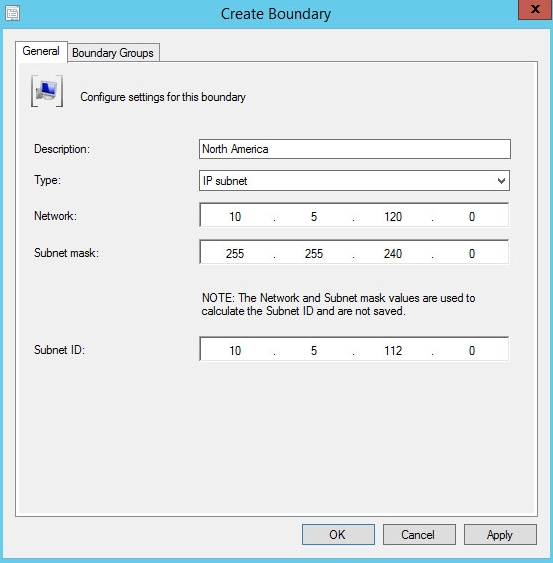
- Select the type of boundary you would like to create. The Type drop-down selector has the following options: IP subnet, Active Directory site, IPv6 prefix, IP address range.
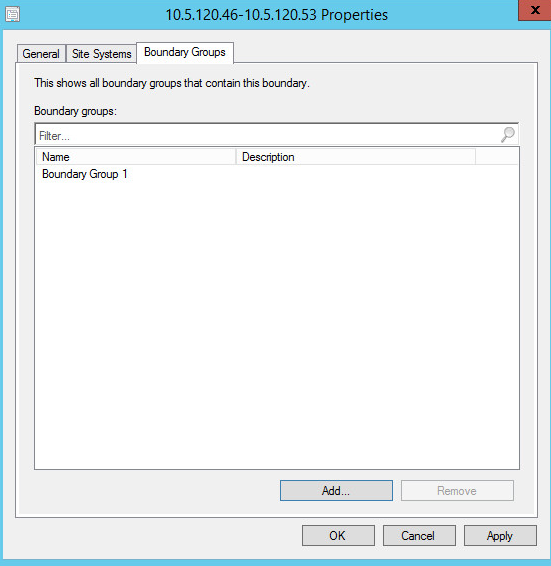
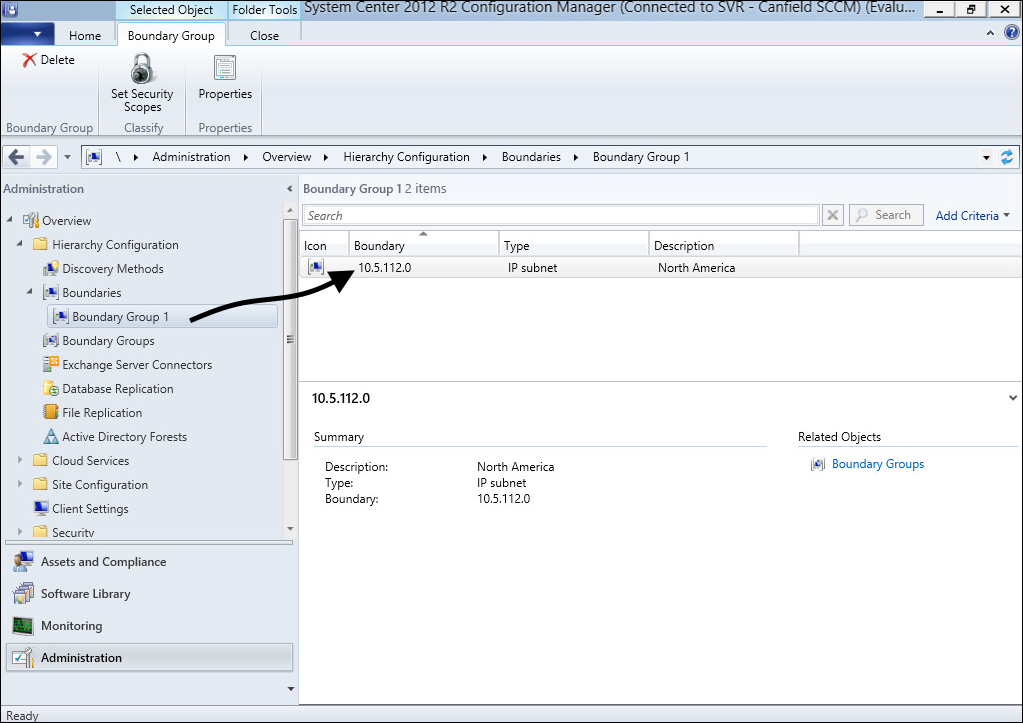
- Select the Boundary Groups tab, and add the boundary to a boundary group. In this example, the boundary is added to Boundary Group 1.
- Select Apply.
- Select OK.
 ​
​
The newly created boundary will now be displayed in Boundaries.
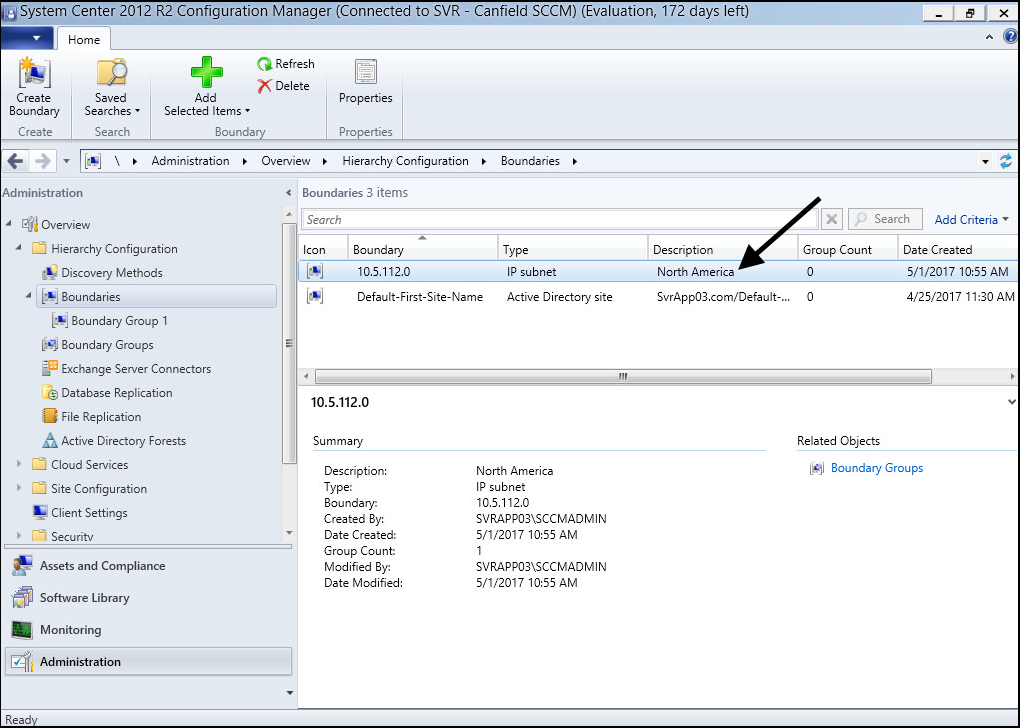
The newly created boundary will now be displayed in the boundary group.
Did you find this article helpful?
If so, consider buying me a coffee over at 