Mule - Create your first Mule Maven application

by
Jeremy Canfield |
Updated: March 11 2020
| Mule articles
If Maven is not installed, download Maven from https://maven.apache.org/download.cgi. Let's say apache-maven-3.5.0-bin.tar.gz is downloaded to /home/john.doe/Downloads. Use tar to extract the downloaded package.
[john.doe@server1 ~]# tar -zxvf /home/john.doe/Downloads/apache-maven-3.5.0-bin.tar.gz -C /etc/maven

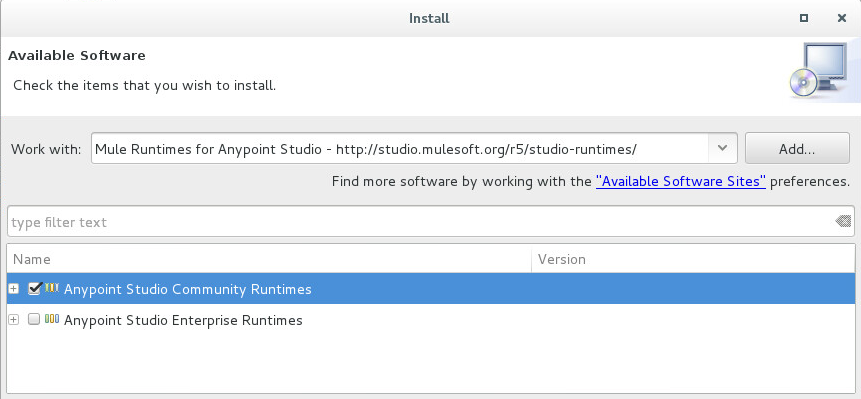
If using the Community Edition of Mule, add the Anypoint Studio Communitiy Runtimes
- In Mule, select Help > Install New Software.
- Select Mule Runtimes for Anypoint Studio, check Anypoint Studio Community Runtimes, and select Next.
- Select Next.
- Select Finish.
- Restart Mule.
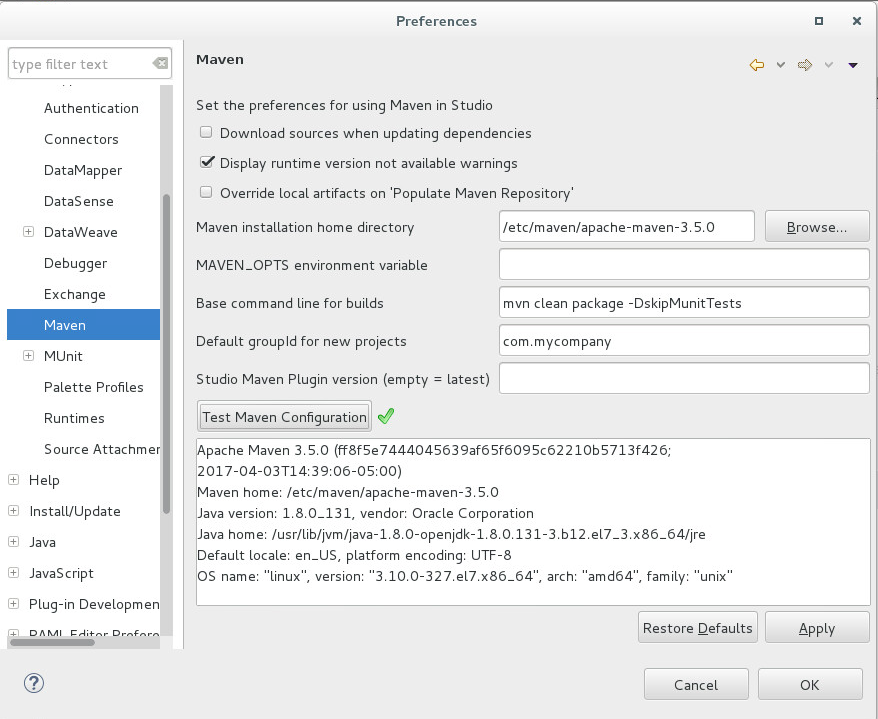
Configure Mule to use Maven
- In Mule, select Window > Preferences.
- In the left panel, expand Anypoint Studio and select Maven.
- Select Browse, navigate to /etc/maven/apache-maven-3.5.0 and select OK.
- Select Test Maven Configuration, and ensure a green check mark is displayed.
- Select Apply.
- Select OK.
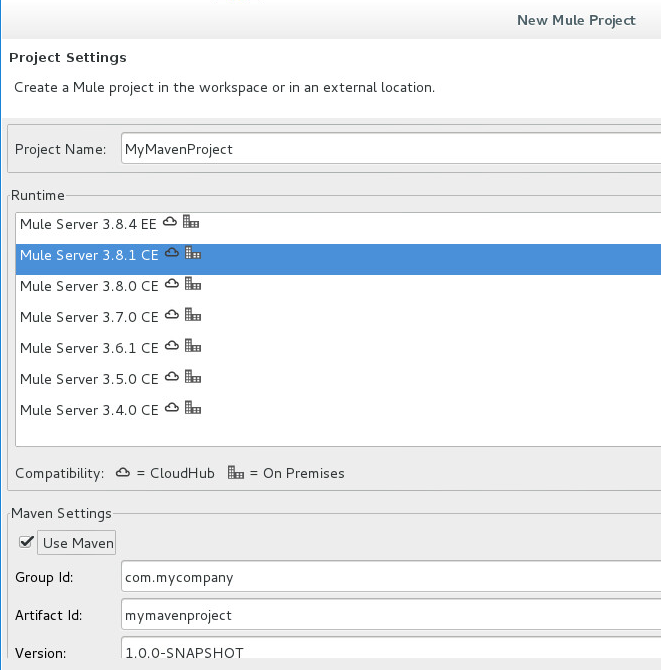
Create a Maven project
- In AnyPoint Studio, select File > New > Mule Project.
- Give the project a name, such as MyMavenProject, check Use Maven, and select Finish.
Note: If using a Community Editon version of Mule, ensure you select one of the CE (Community Editon) Runtimes.
- Drag the HTTP connector to the canvas.
- Search for Set Payload, and drag Set Payload into the canvas, so that the HTTP connector connects to the Set Payload connector.
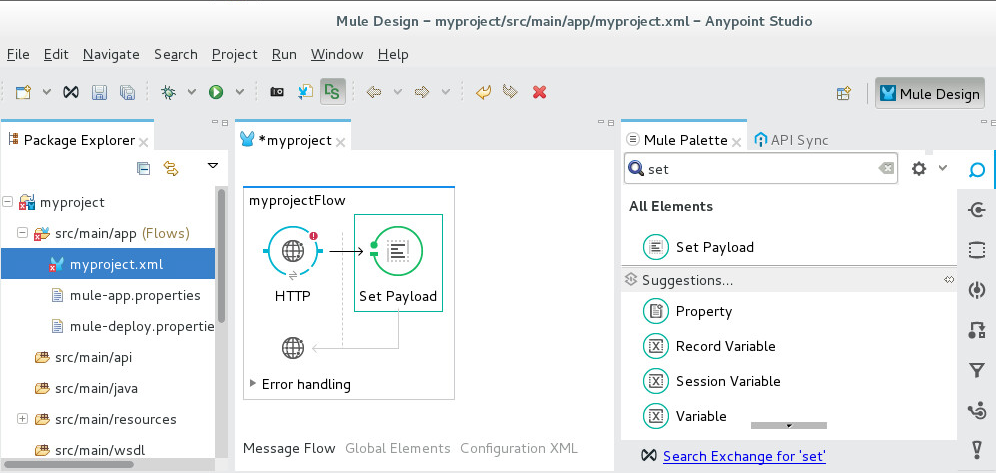
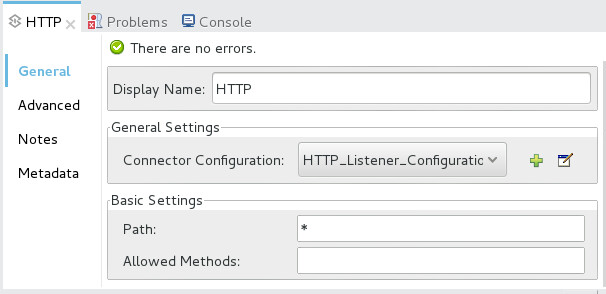
- Hightlight the HTTP connector. Under HTTP, click the green plus icon and select OK. Connector Configuration should now display HTTP_Listener_Configuration.
- Select Path to *.
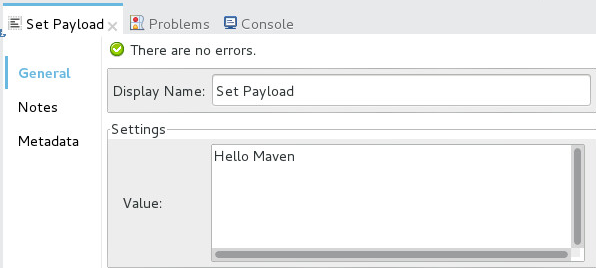
- Select the Set Payload connector, and set value to Hello Maven.
- Select the HTTP connector.
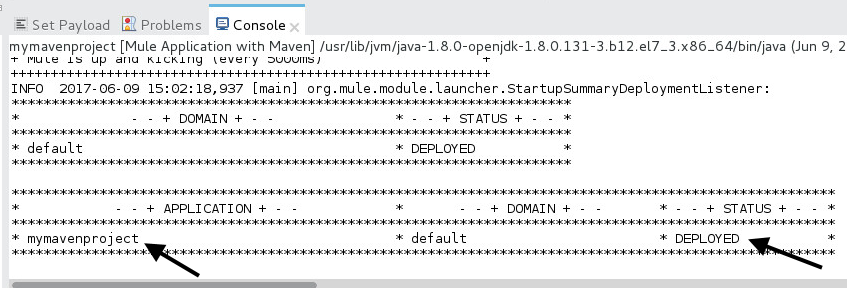
- In the top menu, select Run > Run As > Mule Application with Maven and select OK. The Console should display the name of your project and a status of DEPLOYED.
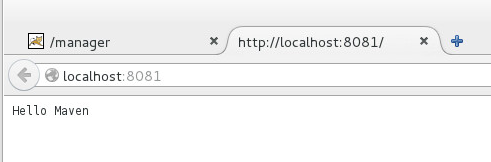
- Navigate to http://localhost:8081, and Hello World should be displayed.
Did you find this article helpful?
If so, consider buying me a coffee over at 