
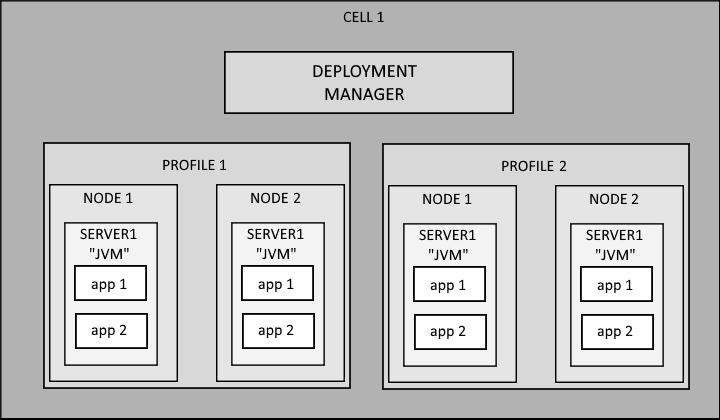
WebSphere is made up of multiple layers. A cell is a sort of container that contains all of the layers, such as the profiles, nodes, and servers. A clean install of WebSphere will not install any of the layers. The creation of a profile is what creates the layers. An install of WebSphere with no profiles is a sort of empty vessel. This article describes how to create a new profile. WebSphere can contain numerous profiles. Think of each unique profile as a container that has one or more nodes.
When possible, it is usually best to create a profile as root (Linux) or administrator (Windows). If you must create a profile as a non-root or non-administrator, then you will need to perform additional file permission and ownership changes, such as making the non-root or non-administrator user the owner of files that make up the profile.
Before you can create a profile, you must install the deployment manager.
At a minimum, the only options that are required to create a profile are -create, -serverType, -templatePath, and -profileName.
~]# /opt/IBM/WebSphere/Dmgr/bin/manageprofiles.sh
-create
-templatePath /opt/IBM/WebSphere/Dmgr/profileTemplates/management/
-serverType JOB_MANAGER
-profileName your_profile_name
When you don't include the -profilePath option, the profile will be created in the was_home/profiles directory.
When you don't include the -cellName option, the cell name will be the hostname of your server followed by Node01Cell1, such as wasNode01Cell1.
When you don't include the -nodeName option, the node name will be the hostname of your server followed by Node01, such as wasNode01.
When you don't include the -serverName option, the server name will be server1.
When you don't include the -isDefault option, the profile will not be identified as the default profile. Certain scripts will do a change to the default profile when the -profileName option is not used in the script.
When you don't include the -enableAdminSecurity, -adminUserName, and -adminPassword options, administrative security will be disabled. Administrative security can be configured after the profile has been created. If these options are used, administrative security will be enabled with a federated repository.
If you will be creating two or more profiles on the same application server, you will want to use the -portsFile or -startingPort option. You may also want to include the -validatePorts option. You wouldn't want to use the -defaultPorts option, as this would configure the profile to use the default ports, such as port 9060 for the web console. You would never use a combination of -portsFile, -startingPort, or -defaultPorts. Instead, you would use only one of these options. If using the -portsFile option, you would specify the path to the files that contains the ports you want to use. If using the -startingPort option, you would specify a value, such as 20000.
If the profile was successfully created, the following output should be displayed.
INSTCONFSUCCESS: Success: Profile your_profile_name now exists.
The profile will now exist at /opt/IBM/WebSphere/Dmgr/profiles.
~]# ls /opt/IBM/WebSphere/Dmgr/profiles
JobMgr01
If the profile was successfully created, the following output should be displayed.
INSTCONFSUCCESS: Success: Profile AdminAgent01 now exists.
The profile will now exist at /opt/IBM/WebSphere/AppServer/profiles. You could also list the profile with the -listProfiles option.
~]# ls /opt/IBM/WebSphere/Dmgr/profiles
AdminAgent01
Using GUI
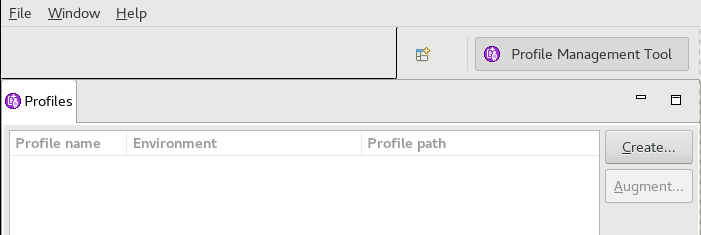
Launch the Profile Management Tool.
~]# /opt/IBM/WebSphere/your_server_name/bin/ProfileManagement/pmt.sh
Select Create.
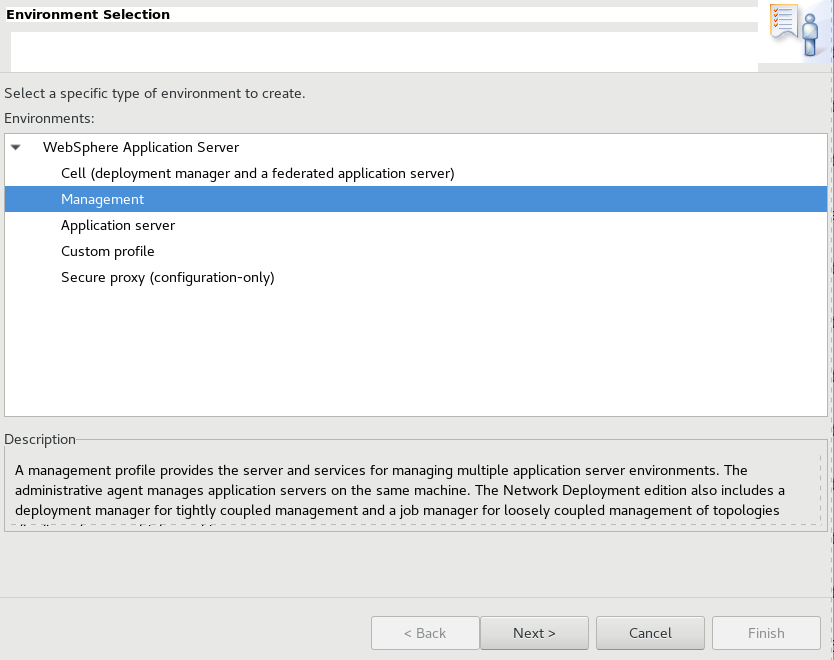
- If creating a profile for a network deployment manager (dmgr), select Management, select Deployment Manager, and follow the prompts.
- If creating a profile for a job manager, select Management, select Job Manager, and follow the prompts.
- If creating a profile for an application server, select Application server, select Next, and follow the prompts.
Did you find this article helpful?
If so, consider buying me a coffee over at 