
In Java, the import statement is used to import a class in a package. For example, the following command imports the class named Hello in the package named my.pkg.
import my.pkg.Hello;

public class Main {
	public static void main(String[] args) {
		Hello();
	}
}
If the class in the package cannot be located, to the left of the import statement will be a red X.
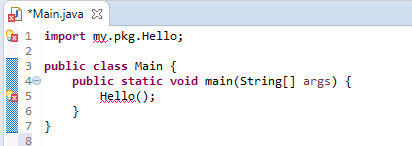
This typically means that the my.pkg.Hello class is in a JAR file, and the JAR file has not been added to your Java Build Path in Eclipse.
- Right-click on your project and select Properties.
- Select Java Build Paths.
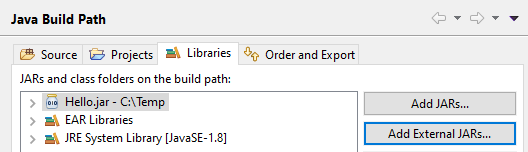
- Select the Libraries tab.
- Select Add External JARs.
- Select the JAR and select Apply.
In this example. Hello.jar has been added to the Java Build Path.
If the class in the package cannot be located when the app is deployed to the application server, and exception should be caught in the application servers log. Here is an example of WebSphere's SystemOut.log showing that the com.ejb.view.HelloWorldRemote package class could not be found.
00000093 ServletWrappe E com.ibm.ws.webcontainer.servlet.ServletWrapper service Uncaught service() exception thrown by servlet ejb.client.EJBServlet: java.lang.NoClassDefFoundError: com.ejb.view.HelloWorldRemote
Caused by: java.lang.ClassNotFoundException: com.ejb.view.HelloWorldRemote
When deploying your app to an application server, such as JBoss, Tomcat, or WebSphere, you can either place the JAR in the /WEB-INF/lib folder of your application, or if the JAR is located on the application server, you can use the application servers JAR. If you have numerous apps on your application server that will be using the same JAR, it probably makes sense to not include the JAR in the apps /WEB-INF/lib directory, and to instead configure the application server to be able to provide the app with the JAR.
Export JAR to /WEB-INF/lib
If you want the JAR to be placed in your apps /WEB-INF/lib folder when the WAR is compiled, you'll want to add a Deployment Assembly. When the WAR is deployed to your application server, the JAR will be in the /WEB-INF/lib directory of your app.
- Select Deployment Assembly.
- Select Add, then select Java Build Path Entries and click Next.
- Select the JAR and select Finish.
- Select Apply.
Now, the JAR will contain "Publish/export dependency: /WEB-INF/lib.
Get JAR from Application Server
As an example, following is how to configure a JVM on WebSphere to use a class in a JAR.
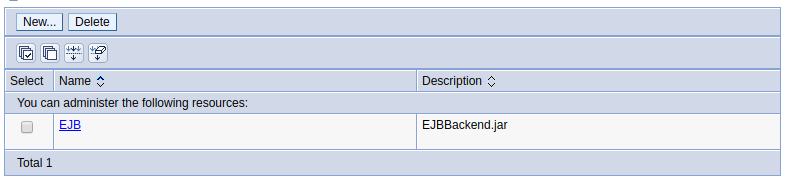
- In the WebSphere admin console, select Environment > Shared libraries.
- Select New.
- Give the shared library a name (EJB in this example).
- In classpath, enter the full location to the JAR file.
- Select OK.
- Select Save.
Configure the JVM to use the EJB shared library.
- In the WebSphere admin console, expand Servers > Server types > WebSphere application servers.
- Select your JVM.
- Expand Java and Process Management and select Class loader.
- Select New.
- Select Classes loaded with parent class loader first and select OK.
- Select Save.
- Select the newly created class loader.
- Select Shared library references.
- Select Add.
- Select EJB.
- Select OK.
- Select Save.

Did you find this article helpful?
If so, consider buying me a coffee over at 