
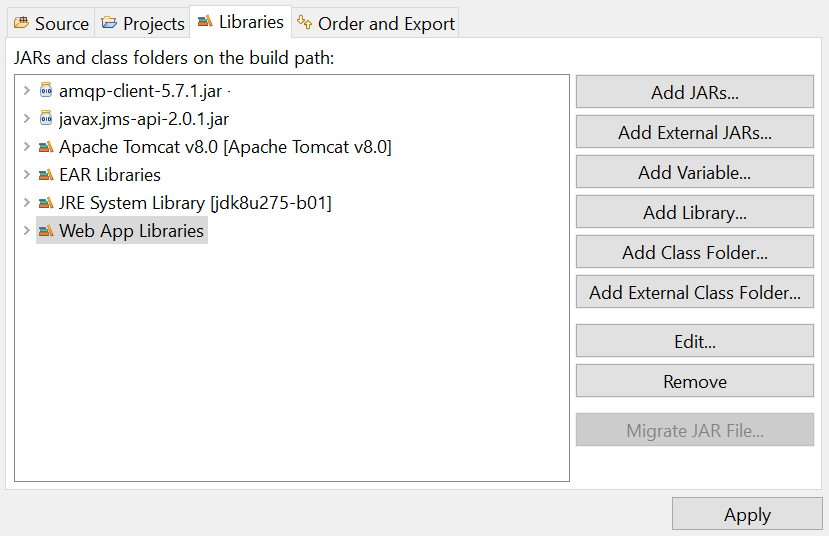
Create a Dynamic Web Project in Eclipse. Let's say the name of the project is rabbitmq. Download amqp-client-<version>.jar and javax.jms-api-<version>.jar and add the JAR files to your build path in Eclipse.
In the left panel of Eclipse, at the name of your project (rabbitmq in this example) > Java Resources > src, create a new package. For the sake of this tutorial, let's name the package com.rabbitmq.demo.
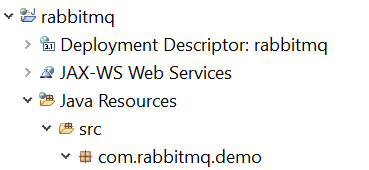
In the package, create a class called producer.

In producer.java, add the following markup. In this example, message "Hello World" will be put onto foo.exchange.
package com.rabbitmq.demo;

import com.rabbitmq.client.AMQP;
import com.rabbitmq.client.Channel;
import com.rabbitmq.client.Connection;
import com.rabbitmq.client.ConnectionFactory;
import java.net.URISyntaxException;
import java.security.KeyManagementException;
import java.security.NoSuchAlgorithmException;
import java.util.Date;
import java.util.HashMap;
import java.text.*;

public class producer {
  public void amqProducer() throws KeyManagementException, NoSuchAlgorithmException, URISyntaxException {
    ConnectionFactory cf = new ConnectionFactory();

    // use amqp if the server is not using SSL (e.g. http)
    cf.setUri("amqp://john.doe:itsasecret@server1.example.com:5671/foo");

    // use amqps if the server is using SSL (e.g. https)
    cf.setUri("amqps://john.doe:itsasecret@server1.example.com:5671/foo");

    Connection conn = null;
    try {
      System.out.println("Trying to connect to " + conn);

      conn = cf.newConnection();

      if (conn != null) {
        System.out.println("Successfully connected to " + conn);
      }
	  else {
	    System.out.println("Failed to connect to " + conn);
	  }

      Channel channel     = conn.createChannel();
      String message      = "Hello World";
      String exchange     = "foo.exchange";
      String routingkey   = "foo.key";
      boolean mandatory   = true;
      Date date           = new Date();
      SimpleDateFormat ft = new SimpleDateFormat ("MM/dd/yyyy 'at' hh:mm:ss a");
      Map<String, Object> headers = new HashMap<String, Object>();
      headers.put("foo", "bar");

      channel.basicPublish(exchange, routingkey,
        new AMQP.BasicProperties.Builder()
        .contentType("text/plain")
        .deliveryMode(2)
        .userId("john.doe")
        .headers(headers)
        .build(),
        message.getBytes());

      System.out.println("Successfully published message '" + message + "' to " + exchange + " on " + ft.format(date));
    }
    catch (Exception e) {
      e.printStackTrace();
    }
    finally {
      try {
        conn.close();
      }
      catch (Exception e) {
          e.printStackTrace();
      }
      finally {
        System.out.println("connection successfully closed");
      }
    }
  }
}
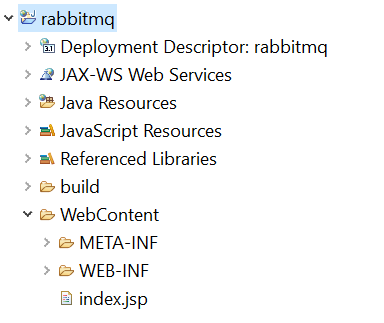
In the left panel of Eclipse, right click on the name of your project (rabbitmq in this example) and select New > JSP File. Select the WebContent folder, give the file a name such as index.jsp, and select Finish.
Add the following to line 1 of the JSP file. This is the combination of the package (com.rabbitmq.main) and the class (producer.java).
<%@page import="com.rabbitmq.main.producer"%>
Add the following inside the <body> tags.
- In this example, "producer" must be used because the name of the class in producer.java is producer.
- In this example, "amqProducer" must be used because the name of the method in producer.java is amqProducer.
<body>
<%
  producer jms = new producer();
  jms.amqProducer();
%>
</body>
Select the green play button in Eclipse should publish the message to the exchange.
Likewise, the main RabbitMQ log file should have something like this. Or, the main RabbitMQ conf file can be updated to log events at log level debug for more verbose logging
accepting AMQP connection <0.7993.1338> (10.17.115.16:54343 -> 10.122.15.2:5672)

connection <0.7993.1338> (10.17.115.16:54343 -> 10.122.15.2:5672): user 'john.doe' authenticated and granted access to vhost 'foo'

closing AMQP connection <0.21250.1339> (10.17.115.16:54343 -> 10.122.15.2:5672, vhost: 'foo', user: 'john.doe')
Did you find this article helpful?
If so, consider buying me a coffee over at 