
HAProxy is a service that can be used to load balance requests between a TCP service, most often, web servers. For example, let's say you have two web servers. HAProxy can be used to load balance the requests across the two web servers, using Round Robin by default.
flowchart TB
haproxy["HAProxy"]
haproxy --> A
haproxy --> B
A Docker image contains the code used to create a Docker container, such as creating a Nginx web server, or a mySQL server, or a home grown app, and the list goes on. In this way, an image is like a template used to create a container. An image is kind of like a virtual machine, but much more light weight, using significantly less storage a memory (containers are usually megabytes in size).
flowchart LR
A["Docker image"] --> B["Docker container"]
The docker pull command can be used to pull down the latest HAProxy image.
~]# docker pull haproxy
Using default tag: latest
latest: Pulling from library/haproxy
7d63c13d9b9b: Pull complete
ca14c2a724ff: Pull complete
ceabb6fa5dbb: Pull complete
3349425285d3: Pull complete
Digest: sha256:1de5579fdbc77260ba5b6ead00b23ee90ef1789354cd4f97802178bbe3063d7d
Status: Downloaded newer image for haproxy:latest
docker.io/library/haproxy:latest
Or you could create Dockerfile so that the Dockerfile contains something like this.
FROM haproxy:latest
Then use the docker build command to create the image, running this command in the same directory as the Dockerfile.
docker build . --tag haproxy:latest
The docker images command can be used to display the HAProxy image.
~]# docker images
REPOSITORY   TAG          IMAGE ID       CREATED      SIZE
haproxy      latest       a68ae3ea0e3d   2 days ago   101MB
By default, the HAProxy container will not include the haproxy.cfg file, and the container will fail to start if the haproxy.cfg file is missing, so we'll need to create a simply, starter haproxy.cfg file. Let's create /usr/local/docker/haproxy/haproxy.cfg on our Docker system, and add the following to haproxy.cfg.
defaults
    timeout connect 5s
    timeout client 1m
    timeout server 1m

listen stats
    bind *:8080
    mode http
    stats enable
    stats uri /stats
The following command can then be used to create and start the HAProxy container. Let's break down this command.
- The docker run command is used to create and start the HAProxy container.
- The --detach flag is used to run the container in the background.
- The --volume option is used to mount the /usr/local/docker/haproxy/haproxy.cfg file to /usr/local/etc/haproxy/haproxy.cfg in the container.
- The --publish option is used both the Docker server and haproxy container to listen on port 8080, which adds a rule to iptables to allow connections between the Docker system and container on port 8080.
- The --name option is used to name the container haproxy.
- The --restart unless-stopped option is used so that the container is started if the Docker server is restarted
- The haproxy image is used.
docker run
--detach
--name haproxy
--restart unless-stopped
--volume /usr/local/docker/haproxy/haproxy.cfg:/usr/local/etc/haproxy/haproxy.cfg
--publish 8080:8080
haproxy
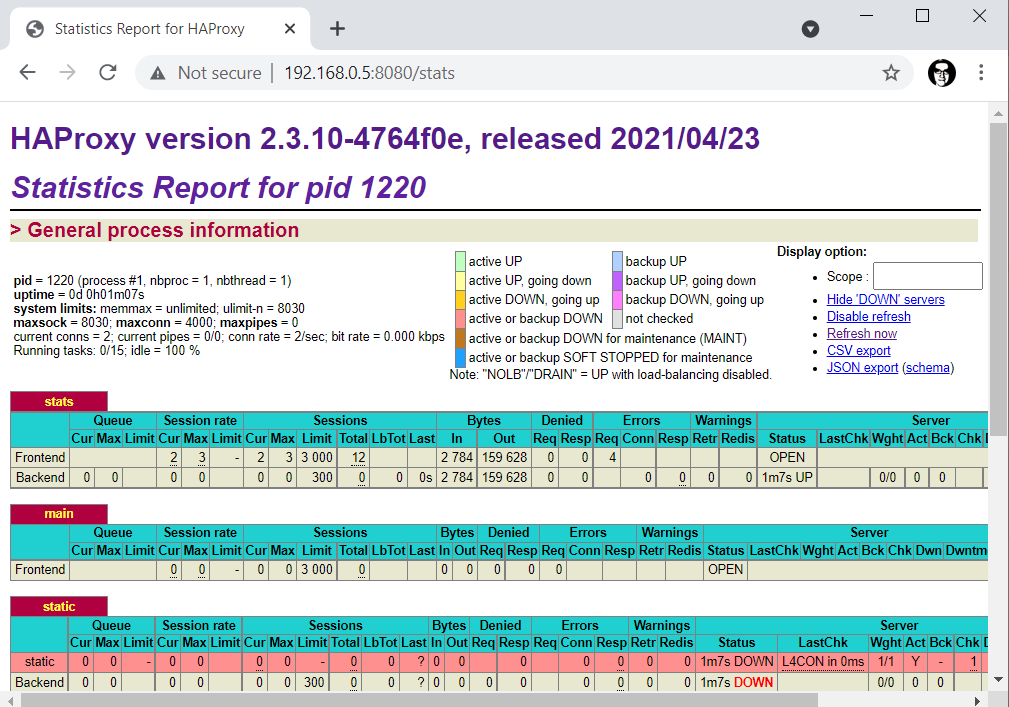
You should now be able to access the stats page at http://<hostname or IP address of your Docker system>:8080/stats.
Did you find this article helpful?
If so, consider buying me a coffee over at 