
An Elastic File System (EFS) is a type of Network File System (NFS) storage that can be setup on Amazon Web Services (AWS). The basic idea behind EFS is to be able to grow and shrink storage as needed based on use.
By default, Red Hat OpenShift on Amazon Web Services (AWS) (ROSA) has the following storage classes.
- gp2
- gp3
These storage classes only allow Persistent Volumes with ReadWriteOnce (RWO) and ReadWriteOnce does not allow the Persistent Volume Claim to be used on different worker nodes. Additionally, these storage classes only support Filesystem storage but do not support Block storage. For this reason, Elastic File System (EFS) can be used to create Shared Volumes that support ReadWriteMany (RWX) so that the Shared Volume can be used on different worker nodes, and the Shared Volume can be set with either Filesystem or Block storage.
The following Amazon Web Services (AWS) resources will need to be created.
- AWS Elastic File System (EFS)
- AWS Elastic File System Access Point (AP)
- AWS Elastic File System Mount Target
For example, let's say you've created an Elastic File System named my-efs.
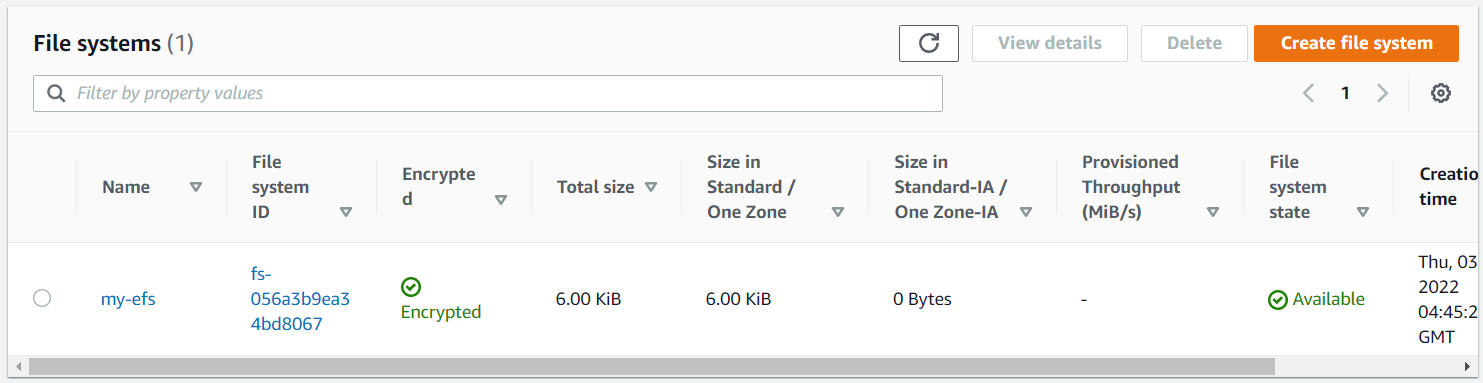
And the Elastic File System has an Access Point (fsap-00187cac9f063f917 in this example).

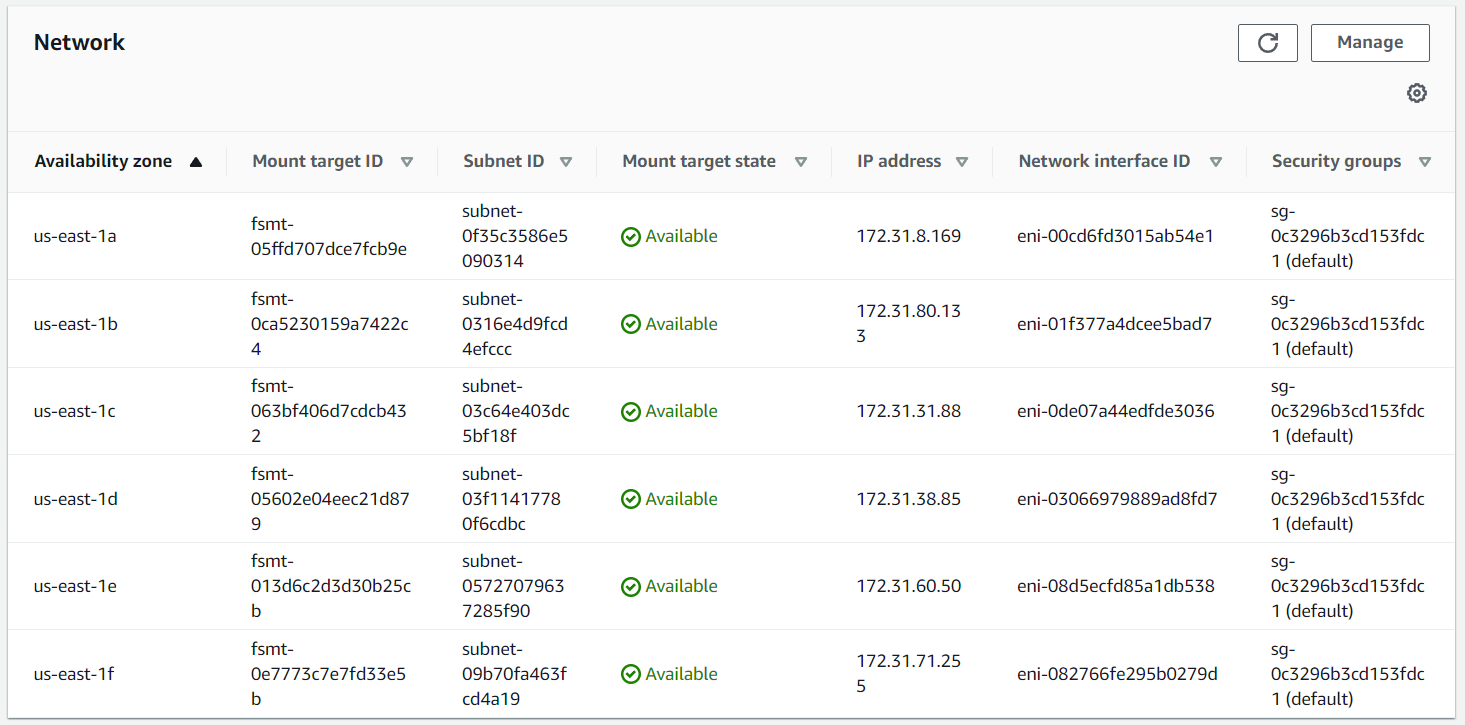
And the Elastic File System has 6 mount targets, which are the 6 Virtual Private Cloud Subnets.
Install the AWS EFS Operator / Storage Class
In the left panel of the ROSA console, select Operators > OperatorHub and install:
- AWS EFS Operator
- AWS EFS CSI Driver Operator
This should create the efs-sc Storage Class, which you can see in the console at Storage > StorageClasses or using the following commands.
~]# oc get operators
NAME                                                            AGE
aws-efs-csi-driver-operator.openshift-cluster-csi-drivers       74d
aws-efs-operator.openshift-operators                            74d

~]# oc get storageclasses
NAME            PROVISIONER             RECLAIMPOLICY   VOLUMEBINDINGMODE      ALLOWVOLUMEEXPANSION   AGE
efs-sc          efs.csi.aws.com         Delete          Immediate              false                  74d
Create Shared Volume
A Shared Volume contains both a Persistent Volume and a Persistent Volume Claim. When creating a Shared Volume, you will need to specify accessPointID (AWS Elastic File System Access Point ID) and fileSystemID (AWS Elastic File System ID).
- accessMode:
- ReadWriteOnce (RWO) - The volume may only be mounted on a single worker node
- ReadWriteOncePod (RWOP) - The volume may only be mounted on a single pod
- ReadOnlyMany (ROX) - The volume may be mounted on different worker nodes
- ReadWriteMany (RWX) - This is the default access mode, The volume can be mounted on different worker nodes
- volumeMode:
- Filesystem (this is the default volume mode, files are stored anywhere on the storage device)
- Block (files are stored in a dedicated block on the storage device, which may result in improved read/write performance)
Here is an example of a SharedVolume YAML file.
apiVersion: aws-efs.managed.openshift.io/v1alpha1
kind: SharedVolume
metadata:
  name: my-shared-volume
  namespace: my-project
spec:
  accessPointID: fsap-04e274b343f1de096
  fileSystemID: fs-07b736fc4cf1bb6a5
  accessMode: ReadWriteMany
  volumeMode: Filesystem
Configure a Deployment to use a Shared Volume
Let's say a Shared Volume named my-shared-volume was created. Here is what you could have in a deployment YAML to mount the Shared Volume.
AVOID TROUBLE
The Shared Volume must exist in the same namespace as the deployment. Shared Volumes are not accessible across namespaces.
spec:
  template:
    spec:
      volumes:
        - name: my-volume
          persistentVolumeClaim:
            claimName: pvc-my-shared-volume

      containers:
          volumeMounts:
            - name: my-volume
              mountPath: /var/data
If the Shared Volume is successfully mounted, the volume should be accessible in the container. Notice in above YAML that pvc-my-shared-volume was mounted to /var/data. In the container, /var/data is owned by the user with ID 99 instead of root, which suggests that /var/data is a mounted volume. Likewise, the mount command in the container should show that the volume has been mounted as a Network File System (NFS).
~]$ oc exec pod/my-pod-hp5w4 -- ls -ld /var/data
drwxrwxrwx. 2   99   99 4096 Aug  2 10:24 data


~]$ oc exec pod/my-pod-hp5w4 -- mount
127.0.0.1:/ on /var/data type nfs4 (rw,relatime,vers=4.1,rsize=1048576,wsize=1048576,namlen=255,hard,noresvport,proto=tcp,port=20053,timeo=600,retrans=2,sec=sys,clientaddr=127.0.0.1,local_lock=none,addr=127.0.0.1)
And here is how you could create a file in the Shared Volume in the container.
~]$ oc exec pod/my-pod-hp5w4 -- echo "Hello World" > /var/data/foo.txt
Sharing EFS Volumes across worker nodes (ReadWriteMany (RWX))
By default, an Elastic File System (EFS) Shared Volume has accessMode ReadWriteMany (RWX) so that the Shared Volume can be used on different worker nodes.
~]# oc get persistentvolumeclaims

NAME                   STATUS   VOLUME                CAPACITY   ACCESS MODES   STORAGECLASS   AGE
pvc-my-shared-volume   Bound    pv-my-shared-volume   1Gi        RWX            efs-sc         153m
Let's say you have two pods, my-app-1 and my-app-2, both configured to use the Shared Volume, running on different worker nodes.
~]# oc get pods -o wide --namespace project001
NAME         READY   STATUS     RESTARTS  AGE  IP              NODE          NOMINATED MODE
my-app-1     1/1     Running    0         8d   10.142.118.51   worker-hsjrp  <none>
my-app-2     1/1     Running    0         8d   10.142.118.52   worker-v8r9r  <none>
You could create a file in the Shared Volume on my-app-1.
oc exec pod/my-app-1 -- echo "Hello World" > /var/data/foo.txt
And the file will be available to my-app-2, which is running on a different worker node.
~]$ oc exec pod/my-app-2  -- cat /var/data/foo.txt
Hello World
Did you find this article helpful?
If so, consider buying me a coffee over at 