
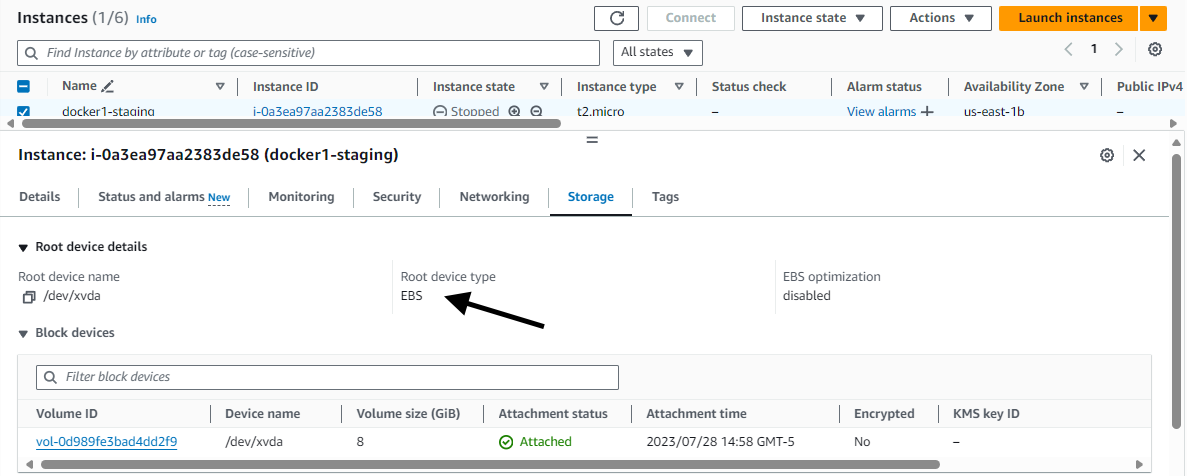
By default, when you create a new EC2 instance, the file system being used by the EC2 instance will be an Elastic Block Storage (EBS) Volume. This can be seen on the Storage tab of your EC2 instance.
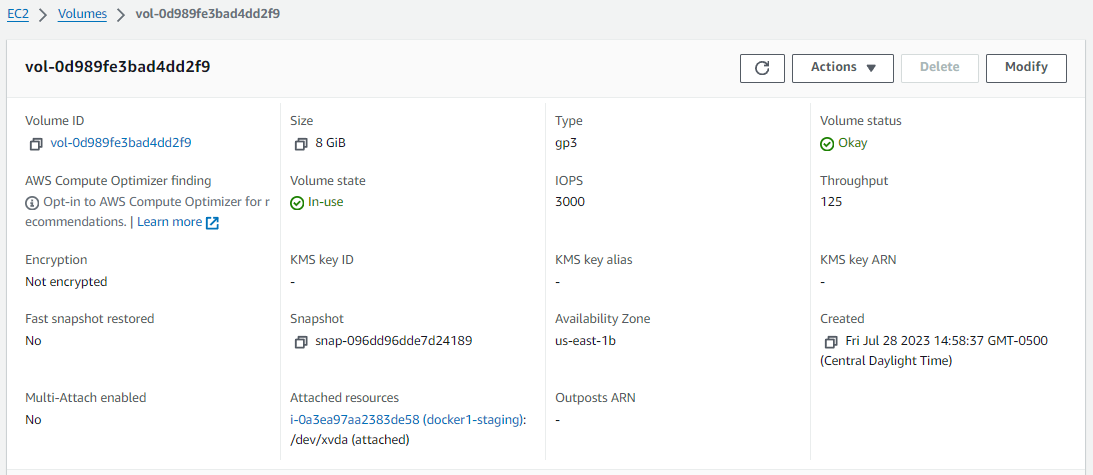
The EBS volume configuration can also be seen in the EC2 console at Elastic Block Storage > Volumes.
Or using the aws ec2 describe-volumes command.
~]$ aws ec2 describe-volumes
[
    {
        "AvailabilityZone": "us-east-1b",
        "Attachments": [
            {
                "AttachTime": "2023-07-28T19:58:37.000Z",
                "InstanceId": "i-0a3ea97aa2383de58",
                "VolumeId": "vol-0d989fe3bad4dd2f9",
                "State": "attached",
                "DeleteOnTermination": true,
                "Device": "/dev/xvda"
            }
        ],
        "Encrypted": false,
        "VolumeType": "gp3",
        "VolumeId": "vol-0d989fe3bad4dd2f9",
        "State": "in-use",
        "Iops": 3000,
        "SnapshotId": "snap-096dd96dde7d24189",
        "CreateTime": "2023-07-28T19:58:37.544Z",
        "MultiAttachEnabled": false,
        "Size": 8
    }
]
Notice in this example that the Elastic Block Storage (EBS) Volume device name is /dev/xvda. If your EC2 instance is a Linux system, the ls (list) command can be used to see that the /dev/xvda is symbolically linked to /dev/nvme0n1 (in this example).
~]$ sudo ls -l /dev/xvda
lrwxrwxrwx. 1 root root 7 Feb  9 03:07 /dev/xvda -> nvme0n1
And the df command can be used to see that /dev/nvme0n1 is mounted to the / (root) directory.
~]$ df --human-readable
Filesystem      Size  Used Avail Use% Mounted on
/dev/nvme0n1p1  8.0G  5.5G  2.5G  70% /
And the mount command can be used to see that /dev/nvme0n1 is mounted to the / (root) with the xfs file system.
~]$ mount | grep nvme0n1
/dev/nvme0n1p1 on / type xfs (rw,noatime,seclabel,attr2,inode64,logbufs=8,logbsize=32k,sunit=1024,swidth=1024,noquota)
And the fdisk command can be used to see that /dev/nvme0n1 is indeed Amazon Elastic Block Store and has 3 partitions (Linux filesystem, BIOS boot, and EFI System).
~]$ sudo fdisk --list
Disk /dev/nvme0n1: 8 GiB, 8589934592 bytes, 16777216 sectors
Disk model: Amazon Elastic Block Store
Units: sectors of 1 * 512 = 512 bytes
Sector size (logical/physical): 512 bytes / 512 bytes
I/O size (minimum/optimal): 4096 bytes / 4096 bytes
Disklabel type: gpt
Disk identifier: 769B4A8E-3919-4F94-9B10-67529B45C4A0

Device           Start      End  Sectors Size Type
/dev/nvme0n1p1   24576 16777182 16752607   8G Linux filesystem
/dev/nvme0n1p127 22528    24575     2048   1M BIOS boot
/dev/nvme0n1p128  2048    22527    20480  10M EFI System
Notice in this example that the Elastic Block Storage (EBS) Volume includes a snapshot (snap-096dd96dde7d24189). The aws ec2 describe-snapshots command can be used. A snapshot is created when the EBS volume is created, but subsequent snapshots are not automatically created, thus it is your responsibility to create snapshots.
~]$ aws ec2 describe-snapshots --query 'Snapshots[?SnapshotId==`snap-096dd96dde7d24189`]'
[
    {
        "Description": "",
        "Encrypted": false,
        "OwnerId": "123456789012",
        "Progress": "100%",
        "SnapshotId": "snap-096dd96dde7d24189",
        "StartTime": "2023-07-25T22:43:53.821000+00:00",
        "State": "completed",
        "VolumeId": "vol-0d989fe3bad4dd2f9",
        "VolumeSize": 8,
        "OwnerAlias": "amazon",
        "StorageTier": "standard"
    }
]
The aws ec2 create-snapshot command can be used to create a snapshot of an Elastic Block Storage (EBS) Volume.
aws ec2 create-snapshot --volume-id vol-0d989fe3bad4dd2f9
Back in the EC2 console, the snapshot at first should be unavailable/pending.
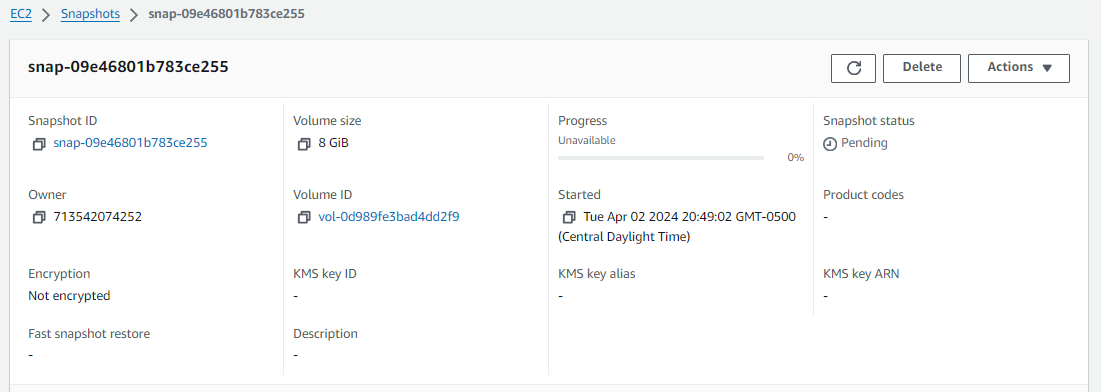
Typically, it only takes a few minutes for the snapshot to be completed.
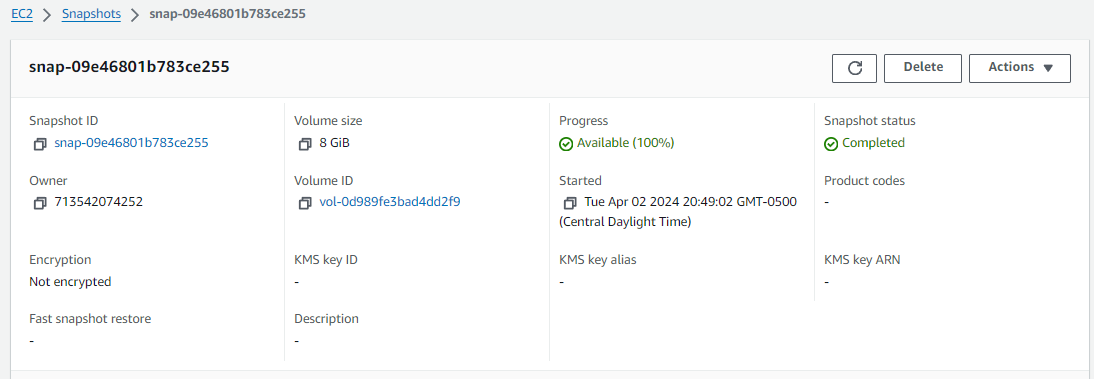
Likewise, the aws ec2 describe-snapshots command should have completed.
~]$ aws ec2 describe-snapshots --query 'Snapshots[?VolumeId==`vol-0d989fe3bad4dd2f9`]'
[
    {
        "Description": "",
        "Encrypted": false,
        "OwnerId": "123456789012",
        "Progress": "100%",
        "SnapshotId": "snap-09e46801b783ce255",
        "StartTime": "2024-04-03T01:49:02.888000+00:00",
        "State": "completed",
        "VolumeId": "vol-0d989fe3bad4dd2f9",
        "VolumeSize": 8,
        "StorageTier": "standard"
    }
]
Did you find this article helpful?
If so, consider buying me a coffee over at 