
AWS Backup is a service that AWS provides to, as you guessed it, backup your resources.
In this simple Getting Started article, I'll show how to use AWS Backup to backup up and then restore an S3 Bucket. So before we get into the AWS Backup stuff, let's create an IAM Role that will have permission to backup the S3 Bucket. Let's create a file named trust.json that contains the following JSON which will allow AWS Backup to assume the role.
{
    "Version": "2012-10-17",
    "Statement": [
        {
            "Effect": "Allow",
            "Principal": {
                "Service": "backup.amazonaws.com"
            },
            "Action": "sts:AssumeRole"
        }
    ]
}
The aws iam create-role command can be used to create a new role. Let's create a role named my-backups-role.
aws iam create-role --role-name my-backups-role --assume-role-policy-document file://trust.json
Then let's create a JSON file that will contain the CloudWatch, EventBridge, and S3 permission that AWS Backup will need to be able to create the backup. For example, let's say the following is in the file named policy.json.
{
    "Version": "2012-10-17",
    "Statement": [
        {
            "Effect": "Allow",
            "Action": [
                "cloudwatch:GetMetricData",
                "events:DeleteRule",
                "events:ListRules",
                "events:ListTargetsByRule",
                "events:PutRule",
                "events:PutTargets",
                "events:RemoveTargets",
                "s3:*"
            ],
            "Resource": "*"
        }
    ]
}
Then the aws iam create-policy command can be used to create the policy.
aws iam create-policy --policy-name my-backups-policy --policy-document file://policy.json
And then the aws iam attach-role-policy command can be used to attach the Permission Policies to my-backups-role. Almost always you'll attach these two policies.
- AWSBackupServiceRolePolicyForBackup
- AWSBackupServiceRolePolicyForRestore
Additionally, to backup and restore an S3 Bucket, you'll also want to attach these two policies.
- AWSBackupServiceRolePolicyForS3Backup
- AWSBackupServiceRolePolicyForS3Restore
aws iam attach-role-policy --policy-arn arn:aws:iam::123456789012:policy/my-backups-policy --role-name my-backups-role

aws iam attach-role-policy --policy-arn arn:aws:iam::aws:policy/service-role/AWSBackupServiceRolePolicyForBackup --role-name my-backups-role

aws iam attach-role-policy --policy-arn arn:aws:iam::aws:policy/service-role/AWSBackupServiceRolePolicyForRestores--role-name my-backups-role

aws iam attach-role-policy --policy-arn arn:aws:iam::aws:policy/AWSBackupServiceRolePolicyForS3Backup --role-name my-backups-role

aws iam attach-role-policy --policy-arn arn:aws:iam::aws:policy/AWSBackupServiceRolePolicyForS3Restore --role-name my-backups-role
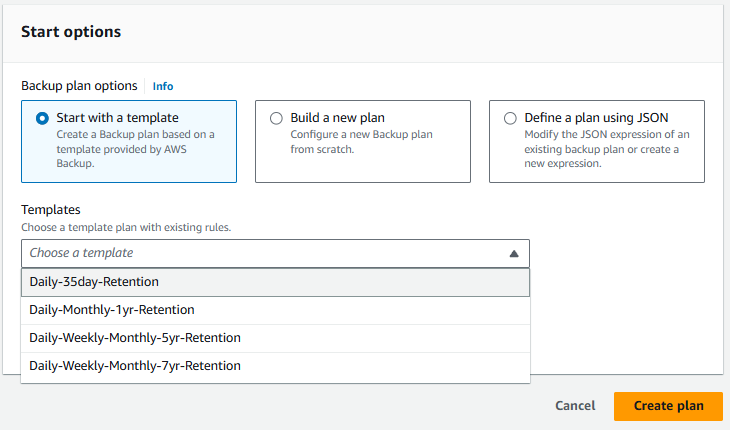
Now, over at AWS Backup, the first step is to create a Backup Plan. This will not actually back up anything. Since this is just meant to be a simple Getting Started article, let's go with Start with a template and choose one of the templates.
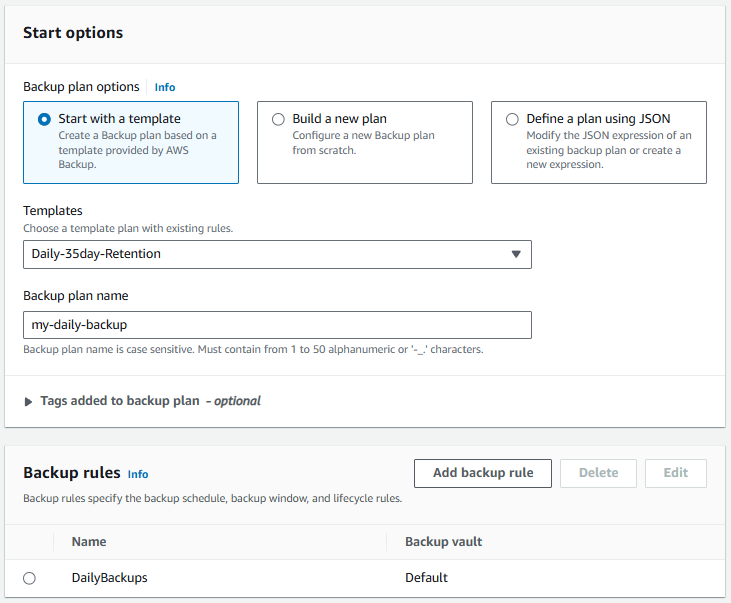
Then give your plan a name and select Create plan.
Or, you could use the aws backup create-backup-plan command.
aws backup create-backup-plan \
--backup-plan "{\"BackupPlanName\":\"my-backup-plan\",\"Rules\":[{\"RuleName\":\"DailyBackups\",\"ScheduleExpression\":\"cron(0 5 ? * * *)\",\"StartWindowMinutes\":480,\"TargetBackupVaultName\":\"Default\",\"Lifecycle\":{\"DeleteAfterDays\":35}}]}"
The Backup Plan has been created! That was easy.
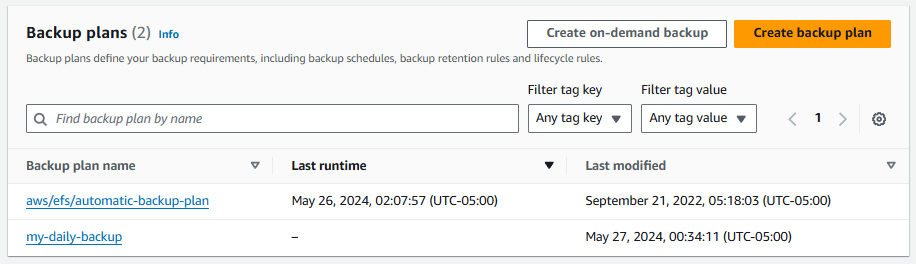
Likewise, the aws backup list-backup-plans should now return the Backup plan you just created.
~]$ aws backup list-backup-plans
{
    "BackupPlansList": [
        {
            "BackupPlanArn": "arn:aws:backup:us-east-1:123456789012:backup-plan:5e3807be-880e-4029-82c0-5beda0a82b3a",
            "BackupPlanId": "5e3807be-880e-4029-82c0-5beda0a82b3a",
            "CreationDate": "2024-05-27T05:34:11.016000+00:00",
            "VersionId": "NDg1MzFkMDAtOTE4OS00YjgwLWI3OTMtN2JkN2MxMjk3NGUz",
            "BackupPlanName": "my-daily-backup"
        }
    ]
}
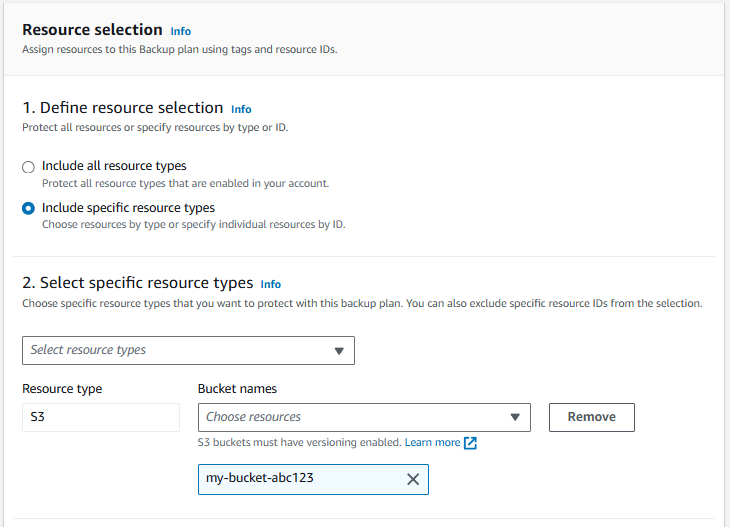
Next you should immediately be prompted to select the resources you want to backup. This is where you want to use the Role you created (my-backups-role).
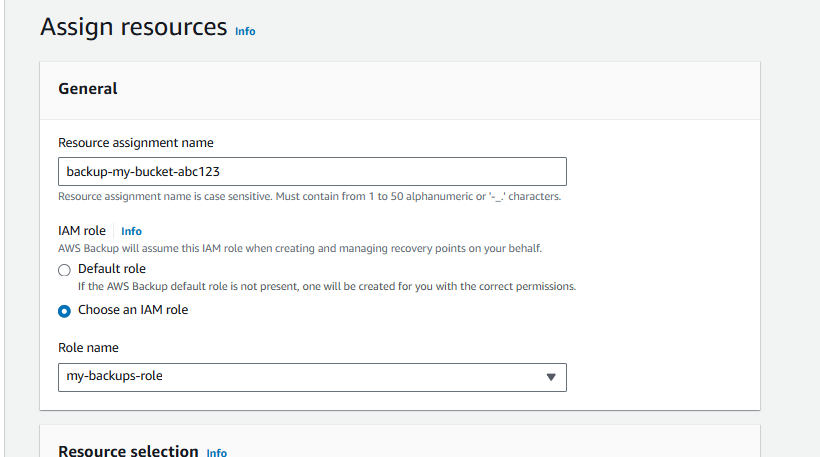
And instead of selecting all resources, which I most definitely would NOT do when just Getting Started, let's select a single resource for testing and proof of concept. I selected one of my testing S3 Buckets.
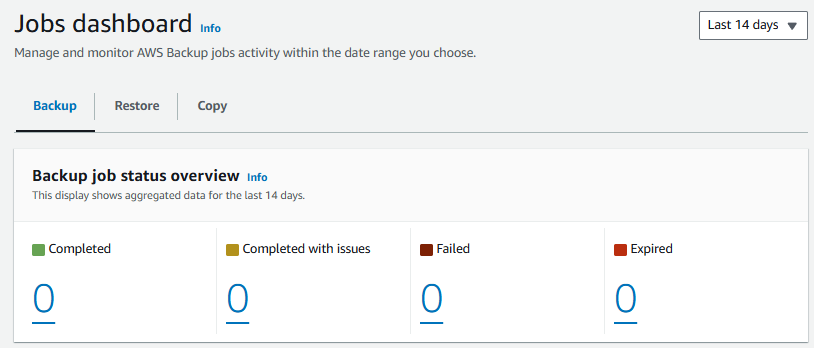
There we go. We should be all set now to have the S3 Bucket backed up daily. Nice. At this point, jobs should be zero, since we just created the plan but the plan hasn't run yet.
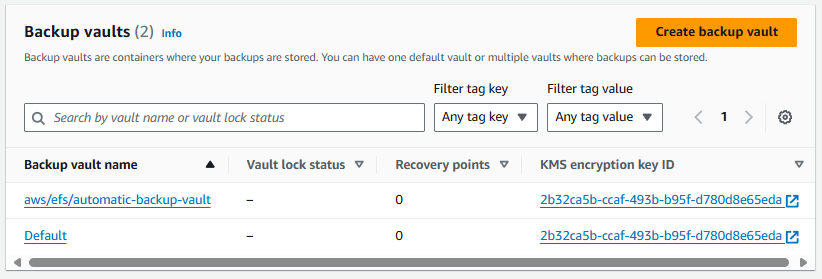
You should have a Backup Vault named Default. The Backup Vault is where your backups will be stored.
Likewise, the aws backup list-backup-vaults command can be used.
~]$ aws backup list-backup-vaults
{
    "BackupVaultList": [
        {
            "BackupVaultName": "Default",
            "BackupVaultArn": "arn:aws:backup:us-east-1:123456789012:backup-vault:Default",
            "CreationDate": "2024-05-27T05:34:10.904000+00:00",
            "EncryptionKeyArn": "arn:aws:kms:us-east-1:123456789012:key/2b32ca5b-ccaf-493b-b95f-d780d8e65eda",
            "CreatorRequestId": "Default",
            "NumberOfRecoveryPoints": 0,
            "Locked": false
        }
    ]
}
If you see Completed with issues and One or more objects failed to be backed up from the source bucket check out my article FreeKB - Amazon Web Services (AWS) - Resolve "One or more objects failed to be backed up from the source bucket".

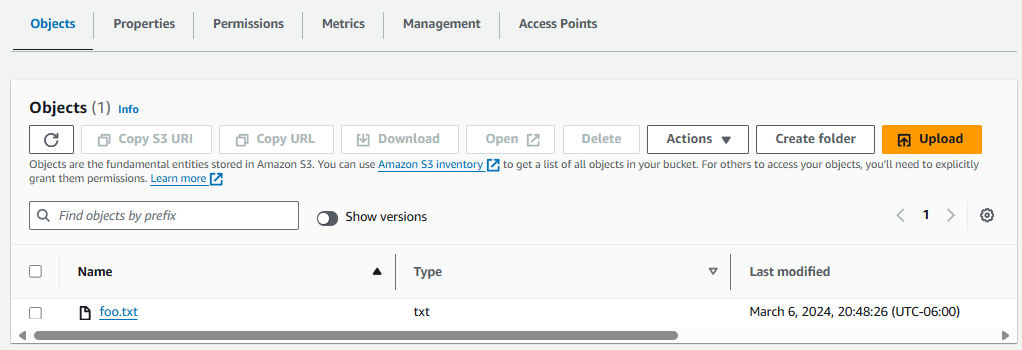
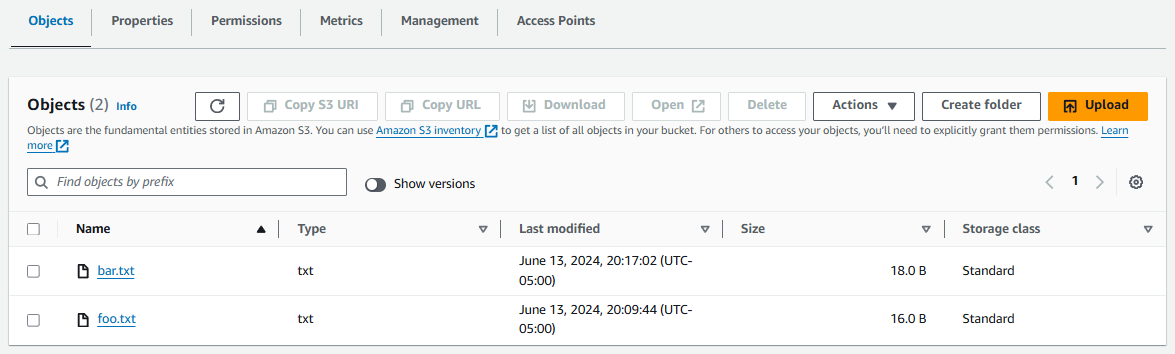
Let's say there is a single object in your S3 bucket, foo.txt in this example.
Let's upload a second object to the S3 Bucket, bar.txt in this example.
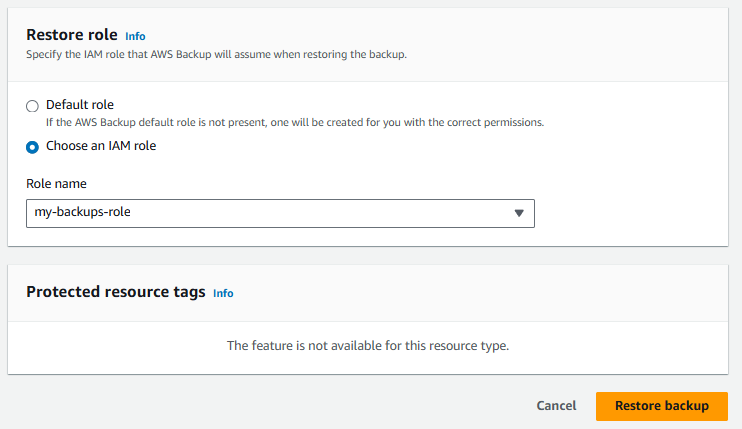
Then let's select the latest backup from the AWS Backup Vault and select Restore.

And select your backups IAM role and then Restore backup.
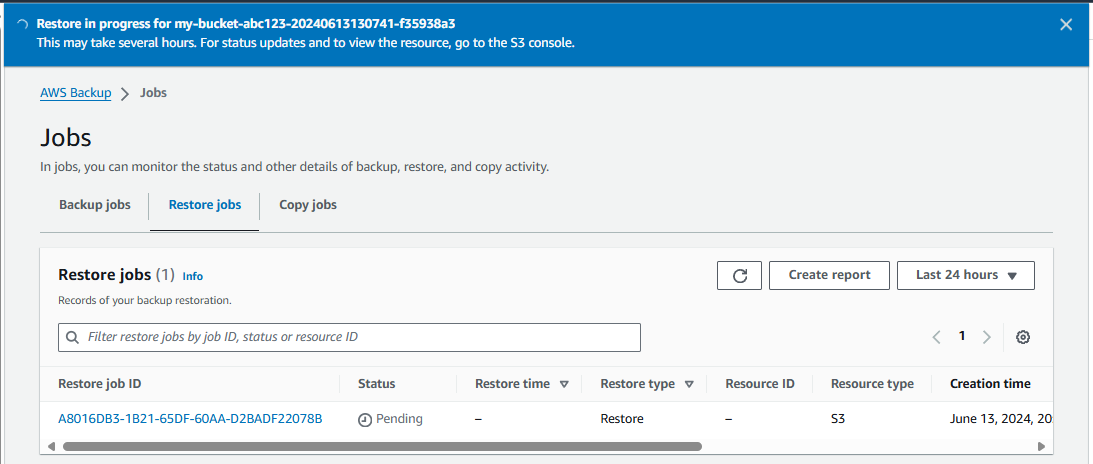
And the restore should be pending. Based on the size of the restore, it may take a few moments or several hours.
Did you find this article helpful?
If so, consider buying me a coffee over at 