
Configuring WebSphere to handle the connection to a database is a multi-step process. This assumes you already have a working database, such as MySQL, MariaDB, Oracle, DB2, or SQL Server. First, you place the database JAR file on each node. Then you create the Java Database Connectivity (JDBC) provider that uses the database JAR file. Next, you create a data source to use the JDBC driver. Then, you configure the J2C alias (username, password). Then, apps can be configured to use the data source.

It is also helped to recognize that an app deployed to WebSphere can make a connection to a database without configuring the JDBC provider, data source, and J2C alias. As an example, the JAR to connect to the database could be placed in the apps /WEB-INF/lib directory, and then the username and password to connect to the database could be hard coded into the app or obtained from a properties file. The reason it usually makes sense to configure an app to make the connection to the database via WebSphere's JDBC provider, data source, and J2C alias is so that you have a single JAR on the system and a single place where the username and password are stored, which makes things easier to manage, especially when dealing with a large number of apps.
In ths example, the MySQL JDBC driver is downloaded, from https://dev.mysql.com/downloads/connector/j/. This will download a tar archive. Move the tar archive onto each WebSphere server that makes up the cell (dmgr and node agent servers). This example is on a Linux server. Decompress the gzip compress tar archive.
~]# gunzip mysql-<version>.tar.gz
Extract the tar archive.
~]# tar -xf mysql-<version>.tar
Copy the MySQL JAR into a directory where you will be storing your JDBC drivers (/opt/jdbc in this example).
~]# cp mysql-connector-java-version-bin.jar /opt/jdbc
In a clustered environment, repeat the above steps on the other servers in the cluster.
Add the JDBC driver to WebSphere.
- In the left panel of the WebSphere web console, expand Resources > JDBC.
- Select JDBC provider.
- In the scope drop-down selector, select a scope (cluster, node, server). Only applications that are in the same scope will be able to use the JDBC provider.
- Select New.
- At Step 1: Create new JDBC provider, select the appropriate database type.
Note: If the drop down does not contain the database you are using, select User-defined and then provide the implementation class, name, and description. To determine the implementation class, you can view the contents of the JAR. In the JAR should be a references to the connection pool data source, such as com/mysql/jdbc/cj/MysqlConnectionPoolDataSource. In this scenario, the implementation class would be com.mysql.jdbc.cj.MysqlConnectionPoolDataSource.
- At Step 2, enter the path to where the JAR is located on the WebSphere server and select Next.
- At step 3, select Finish.
- Select Save.
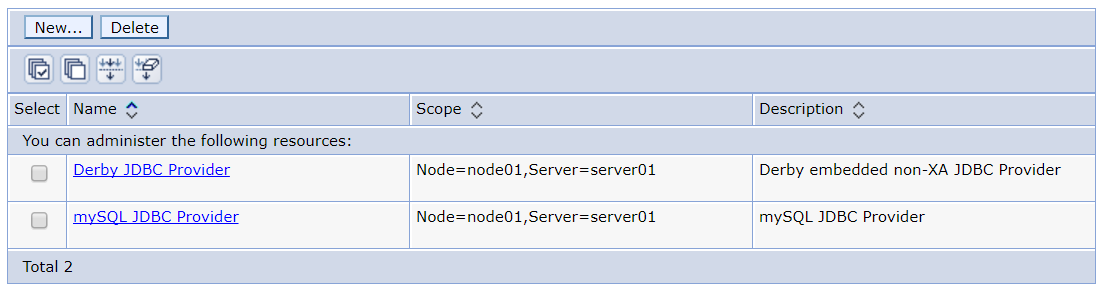
The JDBC provider should now be displayed. Next, create the data source.
WSAdmin
The wsadmin command can also be used to create a data source. This usually only makes sense if there is some problem with the web console, or as part of a scripted process.
wsadmin> AdminTask.createJDBCProvider('[-scope Cell=myCell -databaseType DB2 -providerType "DB2 Universal JDBC Driver Provider"
 -implementationType "XA datasource" -name "DB2 Universal JDBC Driver Provider (XA)"
-description "XA DB2 Universal JDBC
Driver-compliant Provider.
Datasources created under this provider support the use of XA to perform 2-phase commit processing. Use of driver
 type 2 on WAS z/OS is not supported for datasources created under this provider." -classpath
 ${DB2UNIVERSAL_JDBC_DRIVER_PATH}/db2jcc.jar;${UNIVERSAL_JDBC_DRIVER_PATH}/db2jcc_license_cu.jar;
${DB2UNIVERSAL_JDBC_DRIVER_PATH}/
db2jcc_license_cisuz.jar -nativePath ${DB2UNIVERSAL_JDBC_DRIVER_NATIVEPATH}]')
Use the following command to list the JDBC Providers.
# Jython
wsadmin> AdminTask.listJDBCProviders()

# Jacl
wsadmin> $AdminTask listJDBCProviders()
Use the following command to delete a JDBC Provider.
# Jython
wsadmin> AdminTask.deleteJDBCProvider('DB2 Universal JDBC Driver Provider (XA)
(cells/myCell|resources.xml#JDBCProvider_1180538152781)')

# Jacl
wsadmin> $AdminTask deleteJDBCProvider "DB2 Universal JDBC Driver Provider
 (XA)(cells/myCell|resources.xml#JDBCProvider_1180538152781)"
Did you find this article helpful?
If so, consider buying me a coffee over at 