This assumes you have downloaded and installed JMeter.
A test plan is what JMeter uses to know what performance test is being executed. For example, every test plan has the following:
- The hostname of the server being tested
- The resource being tested, such as an HTML page or a Java app
- How much load to put on the target resource
Let’s look at how a new test plan is created. It almost always makes sense to create a new test plan using the JMeter GUI on your local PC, so if you are creating a new test plan, launch the JMeter GUI on your local PC.
# Windows
{jmeter_install_root}/bin/jmeter.bat

# Linux
{jmeter_install_root}/bin/jmeter
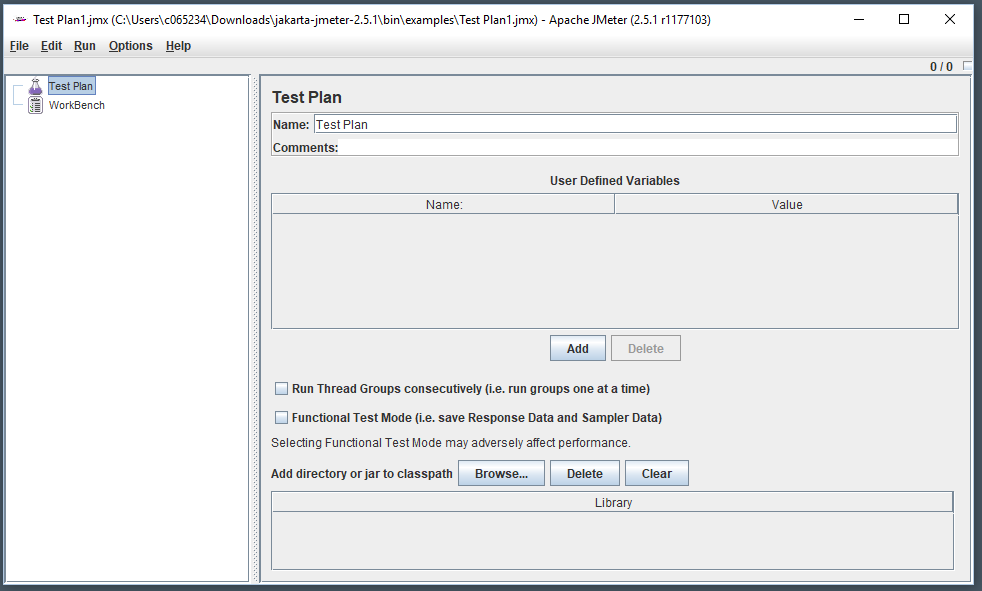
When you first launch JMeter, you should get a view like this.

TEST PLAN - .jmx file
Let's say you want to test the performance your www.example.com web server. You can use JMeter to simulate a bunch of users hitting the index.html page on the web server to see how well the web server is able to respond to a bunch of requests. For example, let's say you want to see how the web server holds up when 100 users submit a request to GET index.html.
To perform this test, you need to create what is called a "test plan". A test plan is actually nothing more than an XML file with the .jmx extension, such as example.jmx.
Define how much traffic you are going to simulate (Thread Group)
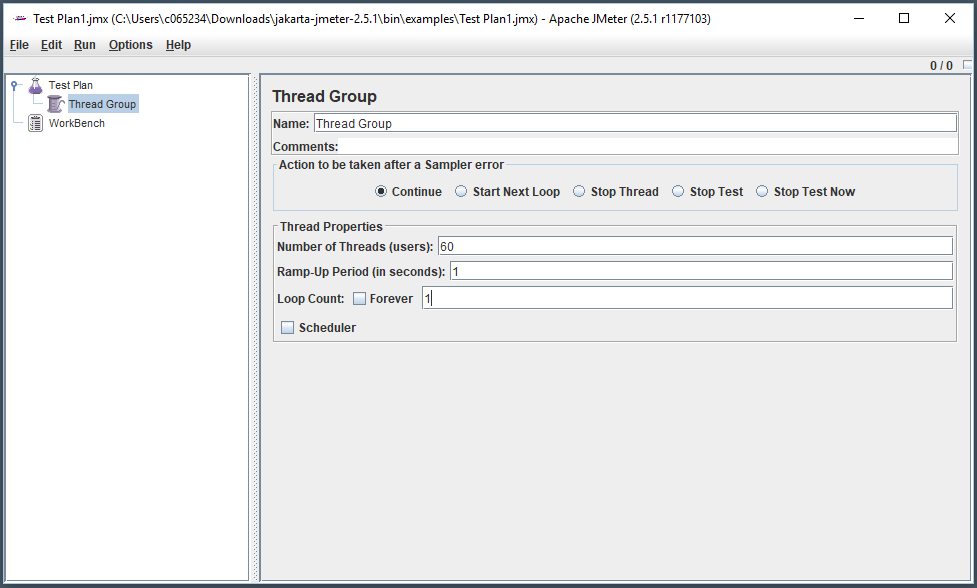
In the left panel of the JMeter GUI, right-click on Test Plan and select Add > Threads (users) > Thread Group. In this example, 60 requests (threads) will be submitted with a 1 second (ramp up period) delay between each request, and the test will be repeated 1 time (loop count).

Define the HTML page being tested
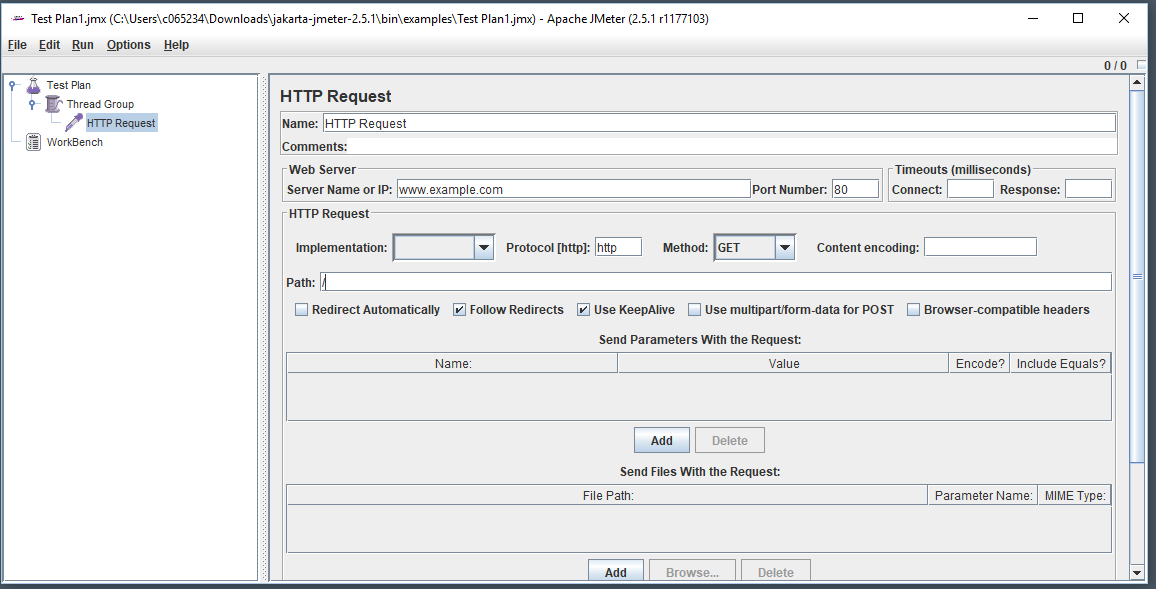
In the left panel of the JMeter GUI, right-click on Thread Group and select Add > Sampler > HTTP Request. In this example, requests will be targetted to http://www.example.com/.

Save your Test Plan as a .jmx file
Now select File > Save Test Plan as,
Run the test
You are now ready to run your test plan.
Did you find this article helpful?
If so, consider buying me a coffee over at 