
First and foremost, it's important to understand that the PayPal SDK uses a client/server model, where the client is the frontend and the server is the backend.

For example, the frontend client could look something like this, where the data gathered in the frontend is then passed onto and processed by the backend.
Check out my article FreeKB - PayPal - JavaScript frontend for more details on how to create the frontend.
If you have not yet followed my article PayPal standard integration checkout using Node.js, you'll probably want to go with the standard integration before trying this advanced integration.
This assumes you have Node.js installed on your system. Check out my article:
This article describes the design where an HTML page running on an HTTP web server uses the PayPal Node.js client to present the PayPal checkout form. Upon entering data into the PayPal checkout form a request is made to a PayPal Node.js server which returns a response to the PayPal Node.js client and the HTTP web server does something with the response, such as saying "order successfully placed.

Let's say your server is a Linux system. Move into your /tmp directory and clone the https://github.com/paypal-examples/docs-examples.git repository.
~]$ cd /tmp
~]$ git clone https://github.com/paypal-examples/docs-examples.git
Let's move into the /tmp/docs-examples/advanced-integration/v2/ directory.
cd /tmp/docs-examples/advanced-integration/v2/
/usr/local/paypal-advanced-integration-v2/server/server.js will set the base constant to "https://api-m.sandbox.paypal.com" or "https://api-m.paypal.com". Let's comment out the base constant.
#const base = "https://api-m.sandbox.paypal.com";
/usr/local/paypal-advanced-integration-v2/server/server.js should have 3 references to the base constant.
const response = await fetch(`${base}/v1/oauth2/token`, {
const url = `${base}/v2/checkout/orders`;
const url = `${base}/v2/checkout/orders/${orderID}/capture`;
Let's update the lower case base constant to upper case.
const response = await fetch(`${BASE}/v1/oauth2/token`, {
const url = `${BASE}/v2/checkout/orders`;
const url = `${BASE}/v2/checkout/orders/${orderID}/capture`;
/usr/local/paypal-advanced-integration-v2/server/server.js should have something like this, a $100.00 USD currency charge.
value: "100.00",
Let's change this to CURRENCY_VALUE.
value: CURRENCY_VALUE,
Let's add the following constant to /usr/local/paypal-advanced-integration-v2/server/server.js.
const { BASE, PAYPAL_CLIENT_ID, PAYPAL_CLIENT_SECRET, PORT, CURRENCY_VALUE } = process.env;
Let's first set this up in the Sandbox environment.
- Go to https://developer.paypal.com/dashboard/applications/sandbox
- Select Create App and follow the prompts to create an app. You should get a Client ID and Secret.
Rename /usr/local/paypal-advanced-integration-v2/.env.example to .env and update .env to have your apps Client ID and Secret. as well as PORT, CURRENCY_VALUE, and BASE. This make it much cleaner if we need to toggle between sandbox and live as we only need to update the .env file.
PORT = 8888
CURRENCY_VALUE = "1.00"
# SANDBOX
#BASE="https://api-m.sandbox.paypal.com"
#PAYPAL_CLIENT_ID="YOUR_CLIENT_ID_GOES_HERE"
#PAYPAL_CLIENT_SECRET="YOUR_SECRET_GOES_HERE"
# LIVE
BASE="https://api-m.paypal.com"
PAYPAL_CLIENT_ID="YOUR_CLIENT_ID_GOES_HERE"
PAYPAL_CLIENT_SECRET="YOUR_SECRET_GOES_HERE"
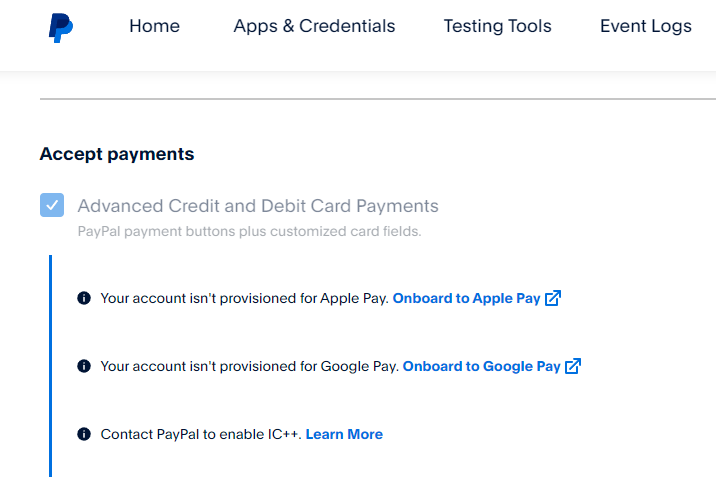
By default, your sandbox app should be setup with support for the advanced integration.
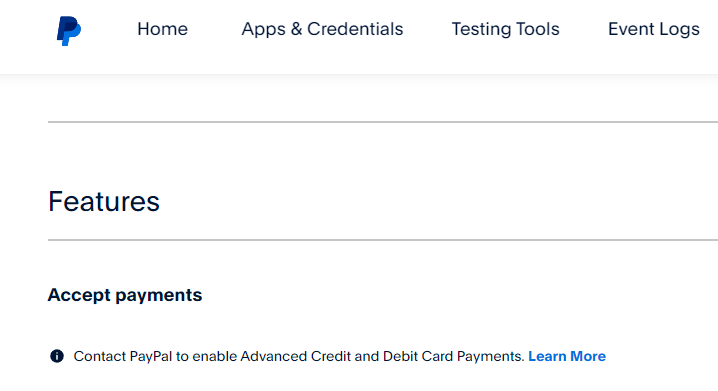
However, your live app may not be setup with support for the advanced integration. I just had to click on the Learn More link and follow the prompts to setup my live app with support for the advanced integration.
By default, /tmp/docs-examples/advanced-integration/v2/server/server.js will have USD 100.00 (e.g. $100.00). You may want to change this, especially when testing/debugging.
const createOrder = async (cart) => {
  console.log(
    "shopping cart information passed from the frontend createOrder() callback:",
    cart,
  );

  const accessToken = await generateAccessToken();
  const url = `${base}/v2/checkout/orders`;
  const payload = {
    intent: "CAPTURE",
    purchase_units: [
      {
        amount: {
          currency_code: "USD",
          value: "100.00",
        },
      },
    ],
  };
While not necessary, I would add console.log lines to /usr/local/paypal-advanced-integration-v2/client/checkout.js, something like this, as this makes it much easier to understand what is happening and to troubleshoot problems.
async function createOrderCallback() {
  console.log(`This is the beginning of the createOrderCallback function`);
Then when pull up the app in your web browser, you should see the console.log events in the developer (f12) console.

While still in the /tmp/docs-examples/advanced-integration/v2/ directory run npm (Node Packages Manager) install command to install the packages listed in the packages.json file.
npm install
Then use the npm start command to start the Node.js app. Notice that the Node.js app is listening on port 8888.
~]$ npm start

> paypal-advanced-integration@1.0.0 start
> nodemon server/server.js

[nodemon] 3.1.0
[nodemon] to restart at any time, enter `rs`
[nodemon] watching path(s): *.*
[nodemon] watching extensions: js,mjs,cjs,json
[nodemon] starting `node server/server.js`
Node server listening at http://localhost:8888/
Let's check to see if firewalld or iptables are running.
]$ sudo systemctl status firewalld
● firewalld.service - firewalld - dynamic firewall daemon
     Loaded: loaded (/usr/lib/systemd/system/firewalld.service; enabled; vendor preset: enabled)
     Active: active (running) since Fri 2024-03-08 22:42:28 CST; 5s ago
If firewalld is up and running, let's use the firewall-cmd --add-port 8888 command to allow connections on port 8888.
~]$ sudo firewall-cmd --add-port=8888/tcp --permanent
success
~]$ sudo firewall-cmd --reload
success
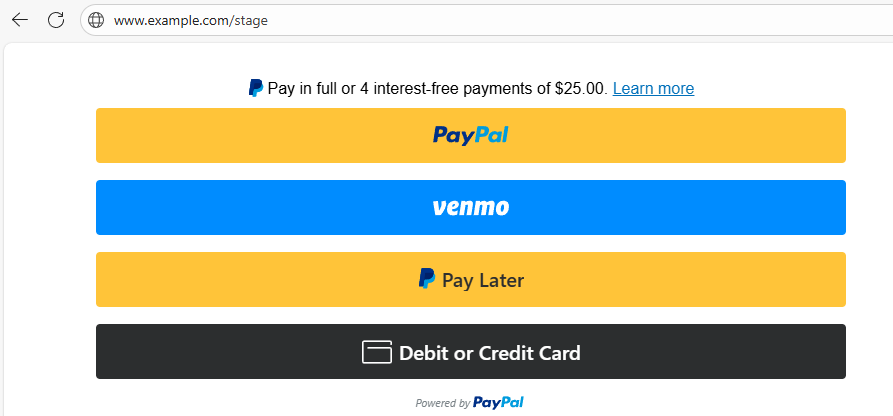
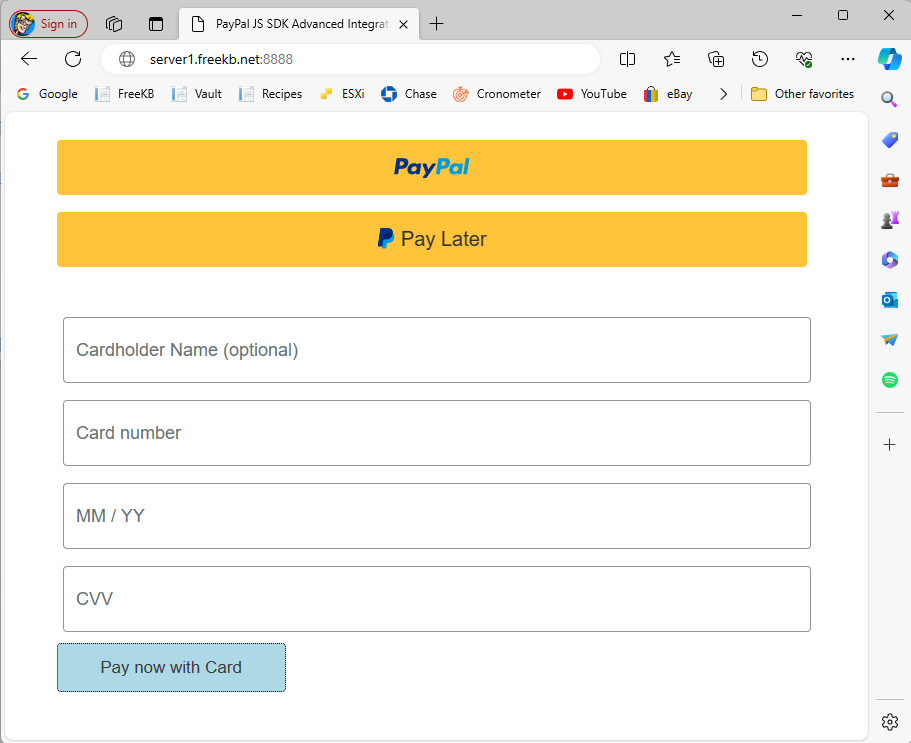
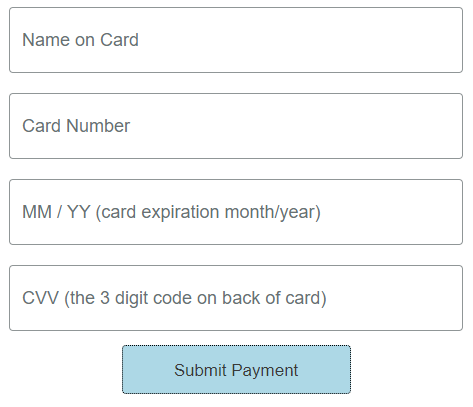
Go to http://<your Docker servers hostname or IP address>:8888/ and something like this should be displayed.
If you don't want the 2 yellow PayPal buttons to be displayed, check out my article Remove yellow PayPal buttons from PayPal advanced integration using Node.js.
Viewing the page source should have something like this, which is your /usr/local/paypal-advanced-integration-v2/server/views/checkout.ejs file.
<!DOCTYPE html>
<html lang="en">
  <head>
    <meta charset="UTF-8">
    <meta name="viewport" content="width=device-width, initial-scale=1.0">
    <link rel="stylesheet" type="text/css"
      href="https://www.paypalobjects.com/webstatic/en_US/developer/docs/css/cardfields.css" />
    <title>PayPal JS SDK Advanced Integration - Checkout Flow</title>
  </head>
  <body>
    <div id="paypal-button-container" class="paypal-button-container"></div>
    <div id="card-form" class="card_container">
      <div id="card-name-field-container"></div>
      <div id="card-number-field-container"></div>
      <div id="card-expiry-field-container"></div>
      <div id="card-cvv-field-container"></div>
      <button id="multi-card-field-button" type="button">Pay now with Card</button>
    </div>
    <p id="result-message"></p>
    <script src="https://www.paypal.com/sdk/js?components=buttons,card-fields&client-id=abcdefg123456789abcdefg123456789abcdefg123456789"></script>
    <script src="checkout.js"></script>
  </body>
</html>
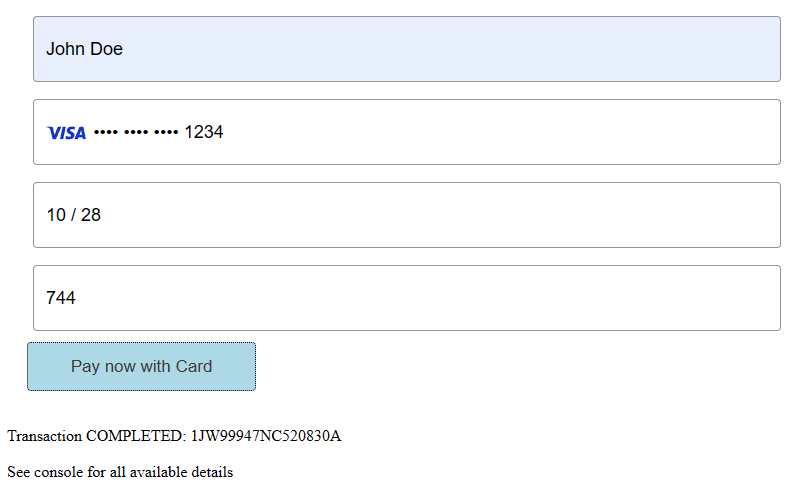
Let's say you want to customize the placeholder text, perhaps something like this, check out my article Customize PayPal advanced integration checkout input form placeholder using Node.js.
Submit a payment and something like "Transaction COMPLETED" should be displayed.
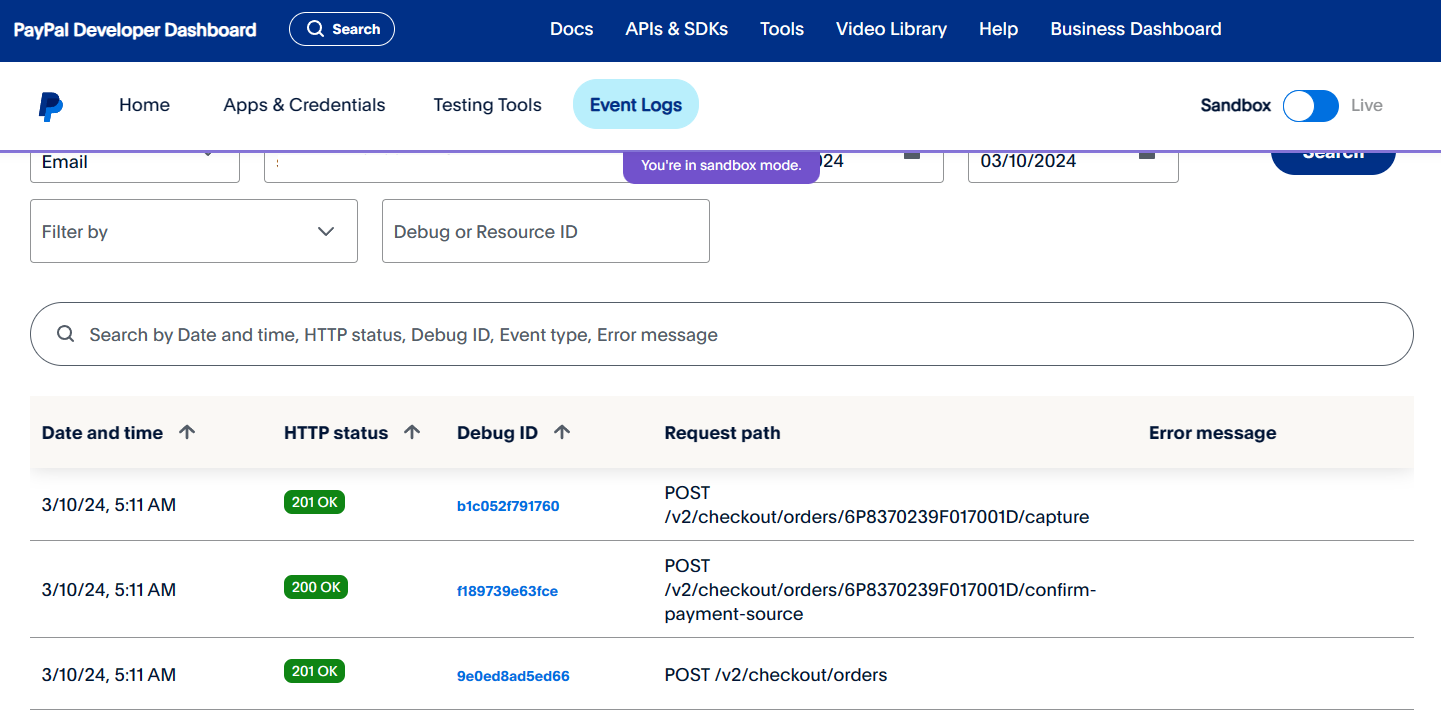
In https://developer.paypal.com/dashboard/applications/sandbox, on the Event Logs tab, there should be 201 OK events for the completed transation.
Did you find this article helpful?
If so, consider buying me a coffee over at 