
This assumes are you familiar with AWS Config. If not, check out my article Getting Started with AWS Config.
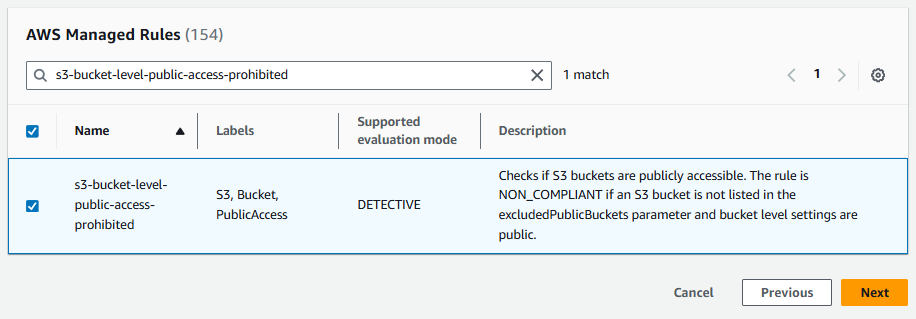
Let's say you have an AWS Config rule that checks if an S3 Bucket has public access allowed.
Let's update the Rule to publish a message to a Simple Notification Service (SNS) Topic when AWS Config finds noncompliance. Check out these articles for the steps on how to create and subscribe to an SNS Topic.
- FreeKB - Amazon Web Services (AWS) - Create Simple Notification Service (SNS) Topics using the AWS CLI
- FreeKB - Amazon Web Services (AWS) - Subscribe to a Simple Notification Service (SNS) Topic using the AWS CLI
Next, let's create a runbook that will be used to publish a messages to the SNS Topic. Check out my article Getting Started with Systems Manager Document Runbook for more details on this.
In the AWS Systems Manager console, select Shared Resources > Documents > Create document > Automation. Let's give our document a meaningful name.
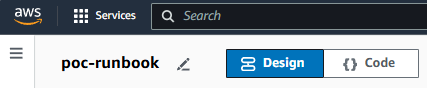
Then select Code and replace the default YAML with the folloiwng YAML and save the runbook.
description: Publish SNS Notification
schemaVersion: '0.3'
assumeRole: '{{ Role }}'
parameters:
  TopicArn:
    type: String
    description: (Required) The ARN of your SNS topic
  s3bucket:
    type: String
    description: (Required) The name of your S3 Bucket
  Role:
    type: String
    description: (Required) The ARN of your IAM role
mainSteps:
  - name: PublishSNSNotification
    action: aws:executeAwsApi
    isEnd: true
    inputs:
      Service: sns
      Api: Publish
      TopicArn: '{{TopicArn}}'
      Message: S3 Bucket {{s3bucket}} has public access allowed
Notice the YAML includes assumeRole: '{{ AutomationAssumeRole }}'. Let's create a policy that allows messages to be published to the SNS Topic. For example, let's say you name the policy my-snspublish-policy.
{
    "Version": "2012-10-17",
    "Statement": [
        {
            "Effect": "Allow",
            "Action": [
                "sns:Publish"
            ],
            "Resource": "arn:aws:sns:region:account-id:sns-topic-name"
        }
    ]
}
And then let's create a role will trust ssm.amazonaws.com for assume role. For example, let's say trust.json contains the following.
{
    "Version": "2012-10-17",
    "Statement": [
        {
            "Sid": "",
            "Effect": "Allow",
            "Principal": {
                "Service": "ssm.amazonaws.com"
            },
            "Action": "sts:AssumeRole"
        }
    ]
}
The aws iam create-role command can be used to create the role.
aws iam create-role --role-name my-role --assume-role-policy-document file://trust.json
And then the aws iam attach-role-policy command can be used to attach the Permission Policy you created to the role. Now when the ssm.amazonaws.com service assumes the role, the service will have permission to publish messages to your SNS Topic.
aws iam attach-role-policy --policy-arn arn:aws:iam::aws:policy/my-snspublish-policy --role-name my-role
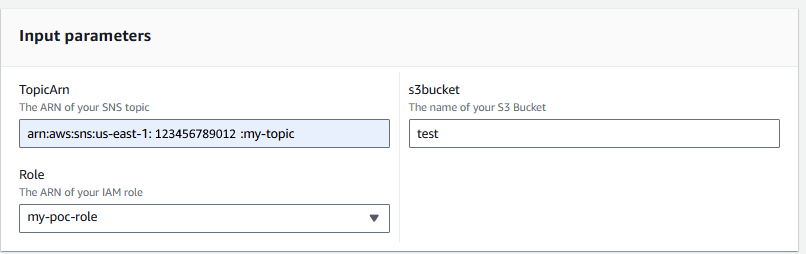
Let's make sure the runbook can publish a message to your SNS Topic. Let's select Execute automation.

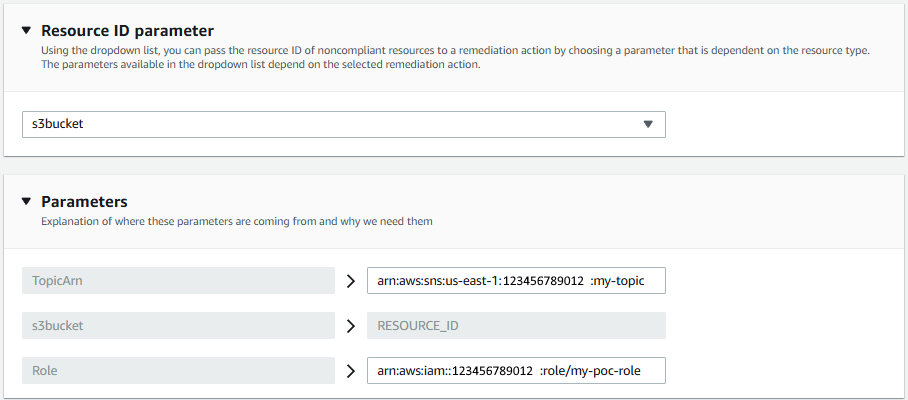
And since the runbook YAML has three variables (TopicArn, s3bucket and Role) let's enter the Amazon Resource Number (ARN) of your SNS Topic, the name of the s3bucket, and the Role you just created and select Execute.
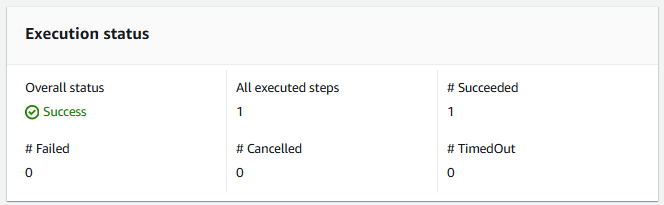
And what you want to see is a successful execution, and the message should be published to the subscribers. In laymen terms, the subscribers should get an email in their inbox.
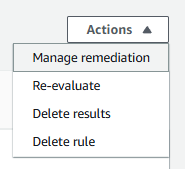
Now, back in the AWS Conifg console, let's select our Rule and then select Actions > Manage remediations.
And in parameters, use the same values that you just used when testing the runbook.
And let's re-evaluate the Rule. A message should get published to your SNS Topic and pushed to the subscribers. Neat!

Did you find this article helpful?
If so, consider buying me a coffee over at 