
There are multiple different types of Identity Providers (IdP) that OpenShift can use for authentication.
- htpasswd
- kubeadmin
- LDAP sync (Active Directory)
- Red Hat build of the Keycloak Operator
- Red Hat Single Sign-On (SSO) (this article)
Both the Red Hat build of the Keycloak Operator and Red Hat Single Sign-On (SSO) (this article) use keycloak as the backend Identity Provider (IdP) system. Red Hat Single Sign-On (SSO) is much easier to install and configure but may limit you from being able to use or configure certain features. For example, Red Hat Single Sign-On (SSO) installs and configures a Postgres SQL database for you, whereas with Red Hat build of the Keycloak Operator you install and configure the Postgres SQL database.
Install the Red Hat Single Sign-On (SSO) Operator
This assumes you have already installed the Red Hat Single Sign On (SSO) Operator.
- Install Red Hat Single Sign On (SSO) Operator on the command line
- Install Red Hat Single Sign On (SSO) Operator using the console
The oc get operators command can be used to confirm that the Red Hat Single Sign On (SSO) Operator has been installed in the sso namespace.
]$ oc get operators
NAME                                                    AGE
rhsso-operator.sso                                      11m
And there should be a rhsso-operator deployment, replica set and pod in the sso namespace.
~]$ oc get deployments --namespace sso
NAME                  READY   UP-TO-DATE   AVAILABLE   AGE
rhsso-operator        1/1     1            1           14m

~]$ oc get replicasets --namespace sso
NAME                            DESIRED   CURRENT   READY   AGE
rhsso-operator-5564c95f95       1         1         1       13m

~]$ oc get pods --namespace sso
NAME                                  READY   STATUS    RESTARTS   AGE
rhsso-operator-5564c95f95-pktgt       1/1     Running   0          12m
Create the keycloak resource
The following command can be used to get the OpenShift ingress "apps" URL. Check out my article FreeKB - OpenShift - Display ingress domain apps URL for more details on OpenShift ingress.
oc get ingresses.config cluster --output jsonpath={.spec.domain}
Let's create a YAML file named keycloak.yaml that contains the following, updating hostname with the "apps" URL returned by the prior command.
apiVersion: keycloak.org/v1alpha1
kind: Keycloak
metadata:
  name: sso
  namespace: sso
  labels:
    app: sso
spec:
  externalAccess:
    enabled: True
  hostname:
    hostname: https://sso.<apps URL returned by the prior command>
  instances: 1
And use the oc apply command to create the keycloak resources.
oc apply --filename keycloak.yaml
Since the namespace of the apiVersion of the Keycloak resource is keycloak.org this should create a keycloak.keycloak.org resource named sso in this example.
]$ oc get keycloak.keycloak.org --namespace sso
NAME   AGE
sso    10s
This should create two pods, keycloak-0 and a postgresql pod.
]$ oc get pods --namespace sso
NAME                                  READY   STATUS    RESTARTS   AGE
keycloak-0                            1/1     Running   0          2m42s
keycloak-postgresql-f965866f9-xv4qb   1/1     Running   0          2m43s
rhsso-operator-5564c95f95-pktgt       1/1     Running   0          12m
A few keycloak services.
]$ oc get services --namespace sso
NAME                     TYPE        CLUSTER-IP       EXTERNAL-IP   PORT(S)             AGE
keycloak                 ClusterIP   10.11.12.13    <none>        8443/TCP            2m59s
keycloak-discovery       ClusterIP   None             <none>        8080/TCP            2m58s
keycloak-monitoring      ClusterIP   10.11.12.13    <none>        9990/TCP            2m58s
keycloak-postgresql      ClusterIP   172.30.117.229   <none>        5432/TCP            2m59s
A keycloak replica set.
]$ oc get replicasets --namespace sso
NAME                            DESIRED   CURRENT   READY   AGE
keycloak-postgresql-f965866f9   1         1         1       3m27s
rhsso-operator-5564c95f95       1         1         1       13m
A keycloak stateful set.
]$ oc get statefulsets --namespace sso
NAME       READY   AGE
keycloak   1/1     3m54s
A keycloak deployment.
]$ oc get deployments --namespace sso
NAME                  READY   UP-TO-DATE   AVAILABLE   AGE
keycloak-postgresql   1/1     1            1           4m10s
rhsso-operator        1/1     1            1           14m
Create a Route
Let's create a YAML file that has the following to create a route to the keycloak service, which then goes to the keycloak app in the keycloak-0 pod.
apiVersion: route.openshift.io/v1
kind: Route
metadata:
  labels:
    app: keycloak
    route-type: default
  name: sso
  namespace: sso
spec:
  host: sso.<your OpenShift ingress apps URL>
  port:
    targetPort: keycloak
  tls:
    termination: reencrypt
  to:
    kind: Service
    name: keycloak
    weight: 100
  wildcardPolicy: None
And use the oc apply command to create the route.
oc apply --filename keycloak.yaml
The route should now exist.
]$ oc get routes --namespace sso
NAME                       HOST/PORT                            PATH      SERVICES   PORT       TERMINATION   WILDCARD
keycloak                   sso.apps.openshift.example.com                 keycloak   keycloak   reencrypt     None
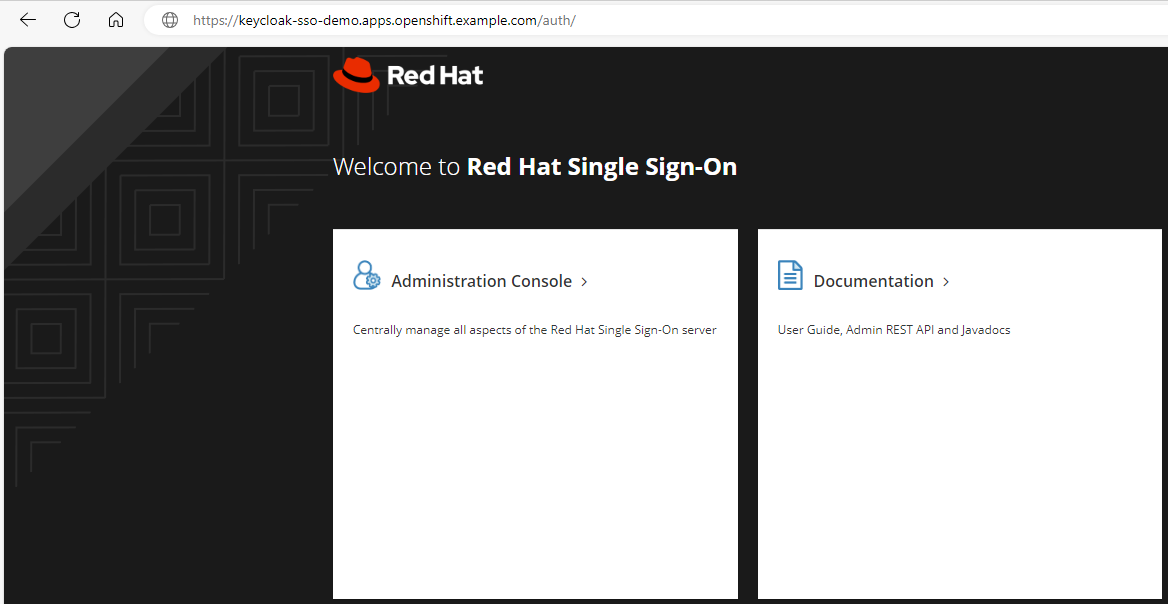
And you should get the SSO console when you go to the route. Nice!
Sign into the SSO console
In this example, since "name" in the keycloak.yaml file is "sso" there should be a secret named credential-sso that contains the base 64 encoded username and password to sign into the SSO console.
~]$ oc get secret credential-sso --namespace sso --output yaml
apiVersion: v1
data:
  ADMIN_PASSWORD: M2labcJnMl9hVmNXYZE9PQ==
  ADMIN_USERNAME: YWzbaZ4=
kind: Secret
metadata:
  creationTimestamp: "2024-10-30T01:20:45Z"
  labels:
    app: keycloak
    keycloak: sso
  name: credential-sso
  namespace: sso
  ownerReferences:
  - apiVersion: keycloak.org/v1alpha1
    blockOwnerDeletion: true
    controller: true
    kind: Keycloak
    name: example-sso
    uid: 643e49f3-f390-4caf-a81e-0b9john.doe9f
  resourceVersion: "355828349"
  uid: a822ad9a-7038-4f3b-ab79-5a04b34f1c2f
type: Opaque
The base64 command can be used to decode the username and password.
~]$ oc get secret credential-sso --namespace sso --output jsonpath="{.data.ADMIN_USERNAME}" | base64 --decode
admin
~]$ oc get secret credential-sso --namespace sso --output jsonpath="{.data.ADMIN_PASSWORD}" | base64 --decode
3ibw2g2_aVcQNA==
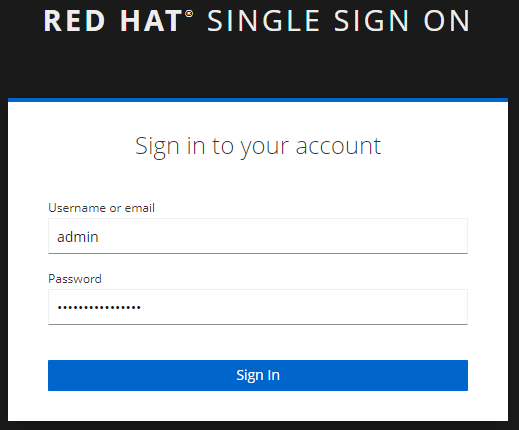
And then you should be able to sign into the SSO console with the decoded admin username and password.
Create an OpenID client
Let's configure OpenShift to use SSO for authentication. In the SSO console, select Manage Realms > add realm.
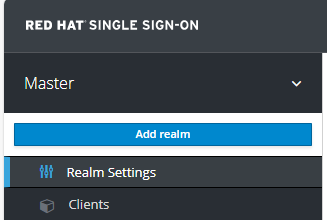
Give the realm a name, ensure it is enabled (of course), and select Create.

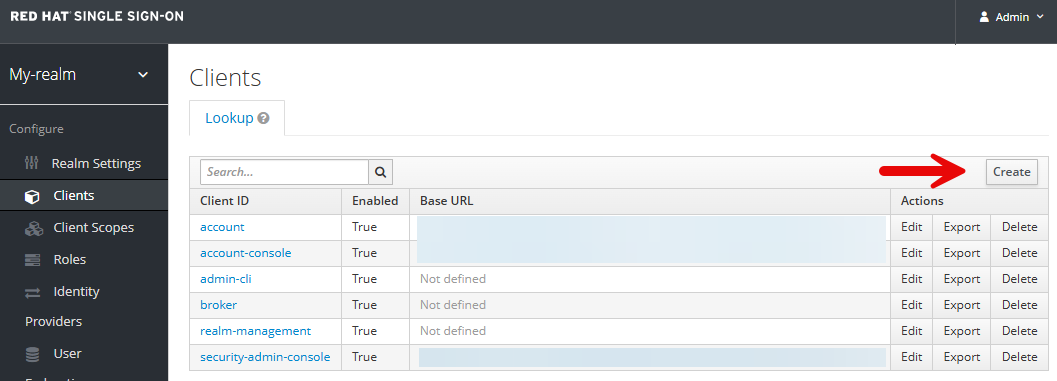
In the realm you created, select Clients > Create client.
Get the oAuth URL of your OpenShift cluster. Check out my article FreeKB - OpenShift - Return oAuth URLs.
~]# oc get ingresses.config cluster --output jsonpath={.status.componentRoutes[].defaultHostname}
oauth-openshift.apps.openshift.example.com
In General settings, ensure the client protocol is OpenID Connect, enter whatever you would like for the client ID, and enter your oAuth URL.

Update the client Access Type to Confidential.
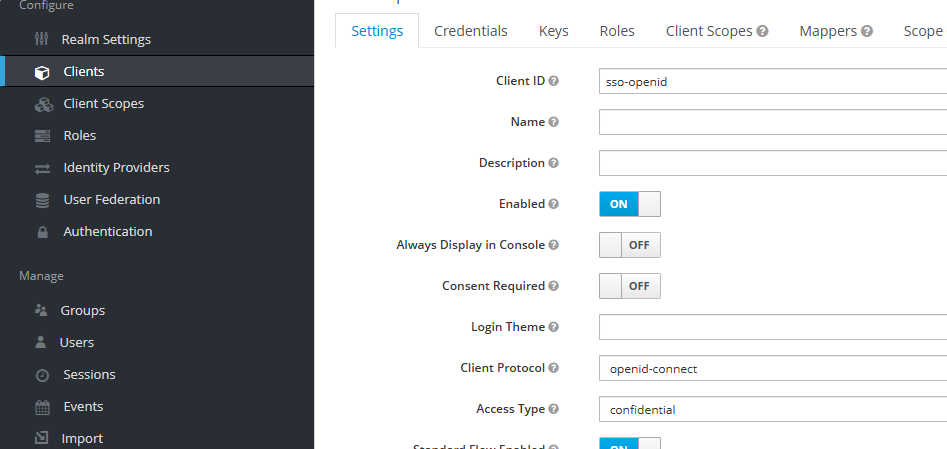
Select the Credentials tab and copy the Secret, which will be something like MdfkjM234MDSFK234sdfkljMKADSFasdfsf. On a Linux system, using printf and base64 to get the base64 encoded value of the secret.
]$ printf MdfkjM234MDSFK234sdfkljMKADSFasdfsf | base64
TWRma2pNMjM0TURTRksyMzRzZGZrbGpNS0FEU0Zhc2Rmc2Y=
Create a secret in the openshift-config namespace that contains clientSecret and the base64 encoded value of the Client Secret.
apiVersion: v1
kind: Secret
metadata:
  name: sso
  namespace: openshift-config
data:
  clientSecret: TWRma2pNMjM0TURTRksyMzRzZGZrbGpNS0FEU0Zhc2Rmc2Y=
type: Opaque
Create a User and Group
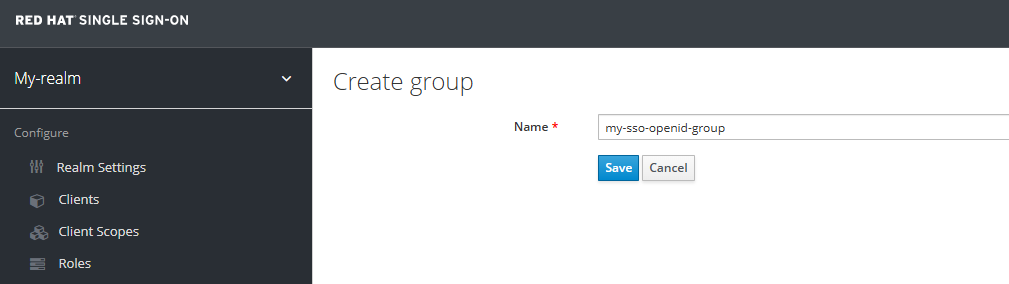
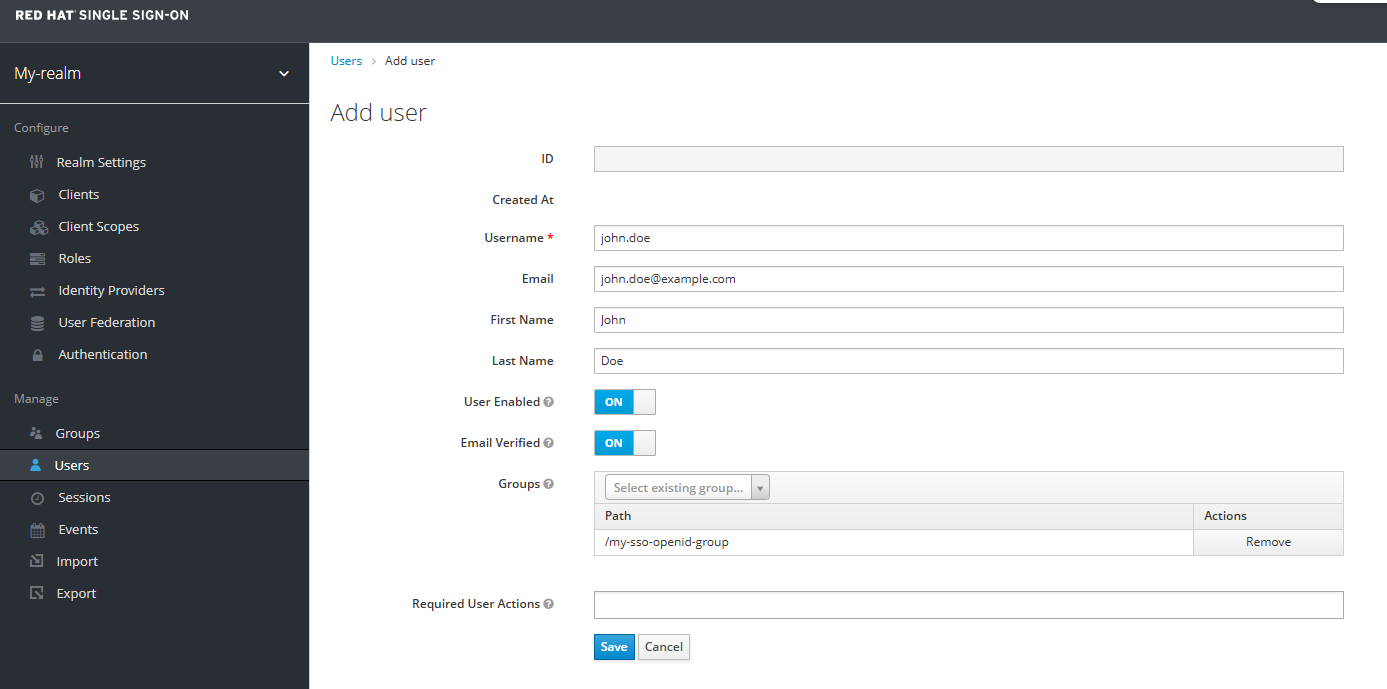
It is noteworthy that in the SSO console, you can pull in users and groups from Active Directory. However, for the purpose of this walkthrough, let’s just create a dummy user and group, for proof of concept purposes.
At Groups, create a group.
Create a user account and ensure the user account is a member of the group you created.
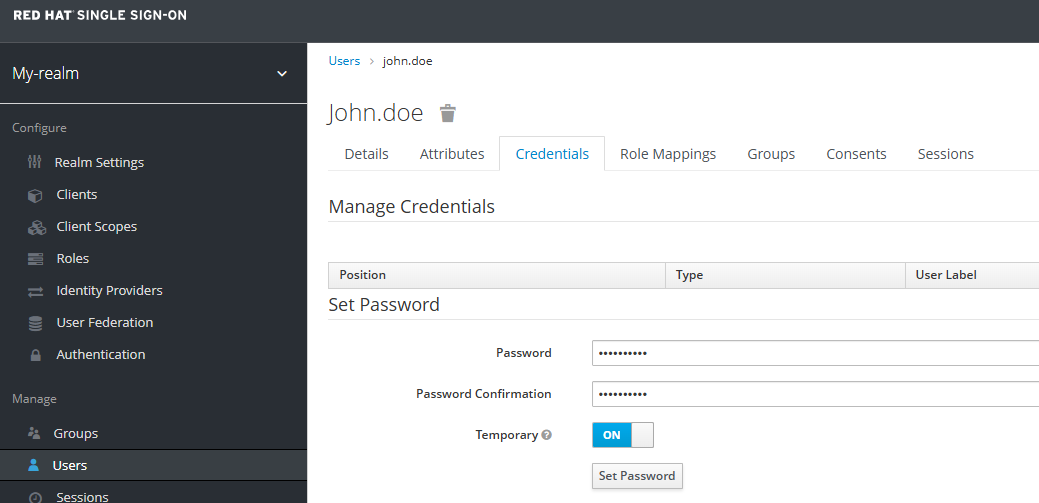
Give the user a password.
Update OpenShift to use SSO as an Identity Provider (IdP)
Before adding the SSO OpenID as an Identity Provider (IdP) in your OpenShift cluster, let's make sure the SSO issuer URL returns a response. You can simply plug the URL into your web browser address bar and something like this should be returned.
{
  "realm": "my-realm",
  "public_key": "MIIBIj...../7xwIDAQAB",
  "token-service": "https://sso.apps.openshift.example.com/auth/realms/my-realm/protocol/openid-connect",
  "account-service": "https://sso.apps.openshift.example.com/auth/realms/my-realm/account",
  "tokens-not-before": 0
}
Last but not least, let's add the SSO Identity Provider (IdP) to the oauth cluster resource.
- clientSecret name must be the name of the secret you created in the openshift-config namespace that contains the sso clientSecret
- openID issuer must be the realm you created in sso that contains your OpenID client
- identityProviders type must be OpenID since an OpenID client was created in sso
- issuer URL must end with the realm you created
apiVersion: config.openshift.io/v1
kind: OAuth
metadata:
  name: cluster
spec:
  identityProviders:
  - mappingMethod: add
    name: sso
    openID:
      claims:
        email:
        - email
        groups:
        - groups
        name:
        - name
        preferredUsername:
        - preferred_username
      clientID: sso-openid
      clientSecret:
        name: sso
      extraScopes: []
      issuer: https://sso.<your OpenShift apps URL>/auth/realms/my-realm
    type: OpenID
This should cause the authentication Cluster Operator to terminate the pods in the openshift-authentication namespace, one at a time, and spawn new pods.
~]$ oc get clusteroperators
NAME                                       VERSION   AVAILABLE   PROGRESSING   DEGRADED   SINCE    MESSAGE
authentication                             4.18.22   True        True          False      122d     OAuthServerDeploymentProgressing: deployment/oauth-openshift.openshift-authentication: 2/3 pods have been updated to the latest generation and 2/3 pods are available
And you should see the pods in the openshift-authentication namespace Terminating and new pods being spawned.
~]$ oc get pods --namespace openshift-authentication
NAME                               READY   STATUS        RESTARTS   AGE
oauth-openshift-79776b975b-rnf6n   1/1     Terminating   0          117s
oauth-openshift-7b895986c9-f4zcw   1/1     Running       0          46s
oauth-openshift-7b895986c9-pxmcv   0/1     Pending       0          19s
oauth-openshift-7b895986c9-z5z54   1/1     Running       0          60s
Now when you go to the oauth URL to sign into your OpenShift cluster, there should be an SSO option. Awesome!
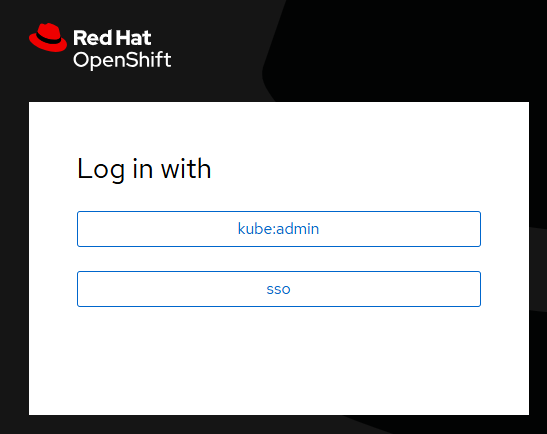
And you should be able to sign into the OpenShift cluster using one of your user accounts in keycloak.

Did you find this article helpful?
If so, consider buying me a coffee over at 